Customizing the Calendar
Customizing the Calendar
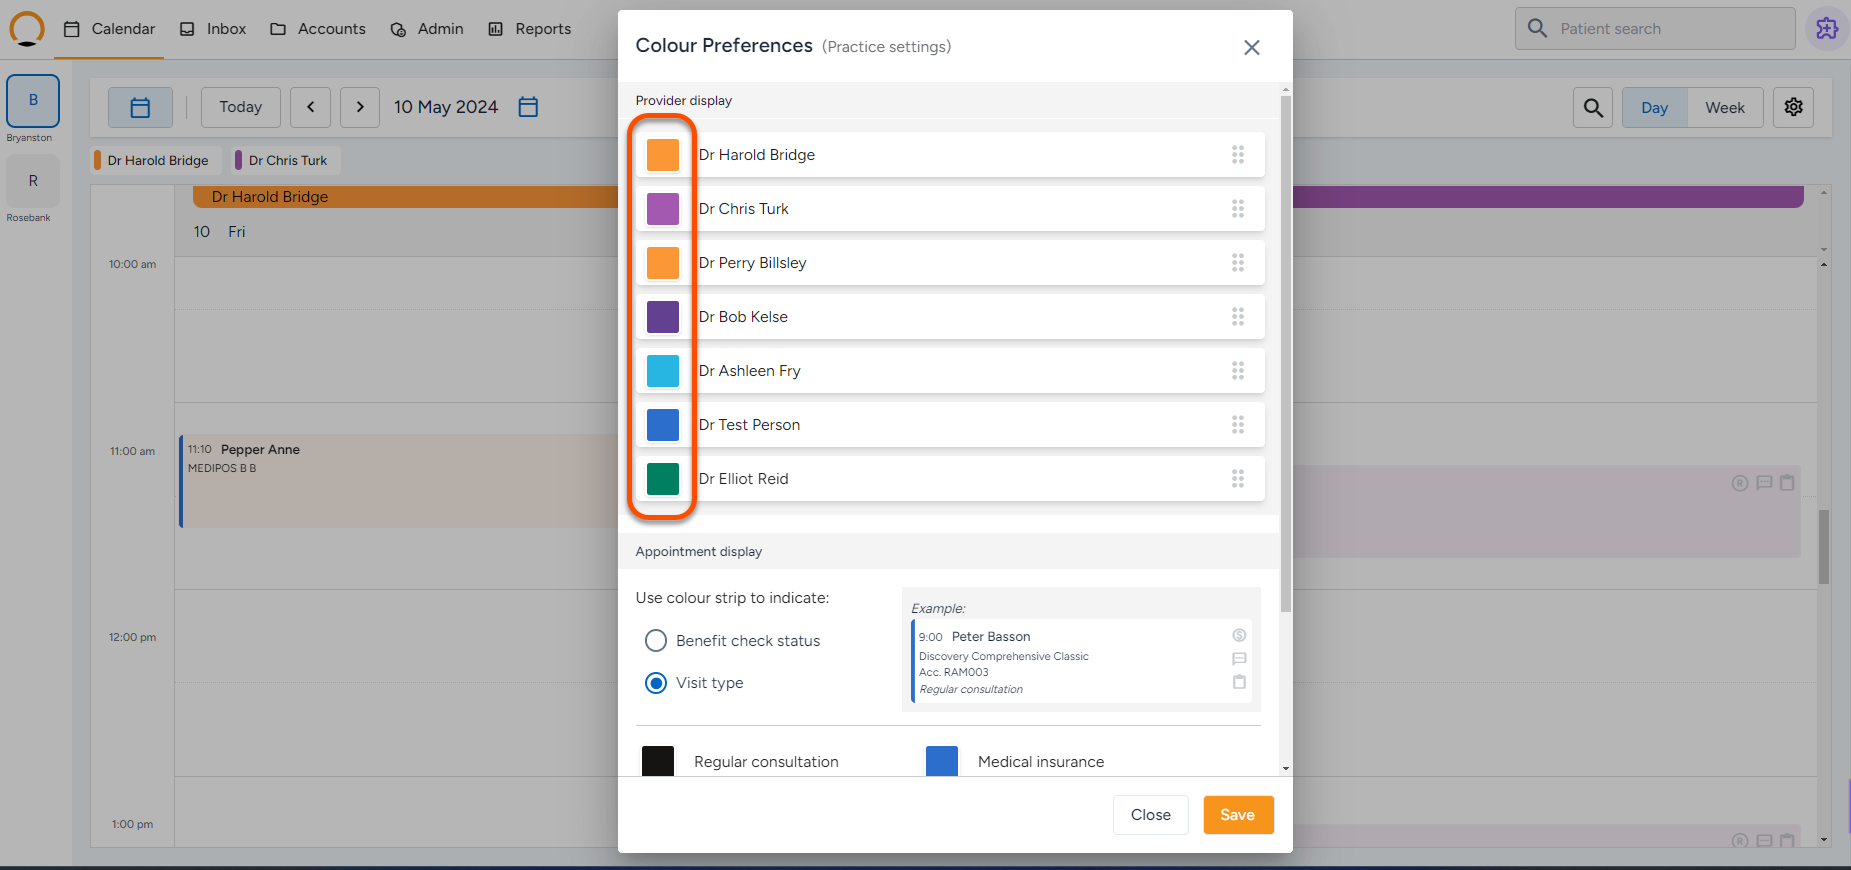
How to customise different Provider's colour selection on the Calendar
- To format the colours for the Providers and the Branches, click on the settings button above the calendar
- Select the “Colour preferences” option.
- Clicking on the colour next to the provider name you are able to change the colour or make use of the “more colours” option.
How to customise the appointment Display
- To format the colours for different appointment types, click on the settings button above the calendar.
- Select the “Colour preferences” option.
- If “Benefit check Status” is selected the colour strip per appointment will automatically populate based on the response from the scheme.
- If “Visit Type” is selected the user can select specific colours to reflect upon specific appointments.
| Note: The colour will be indicated by a strip on the appointment booking as shown in the above example. |
How to customise Display Preferences on the calendar
- To format the colours for different appointment types, click on the settings button above the calendar.
- Select the “Display Preferences” option.
- The user can now adjust different settings that work best for the practice.
Density preference
- This helps the practice choose the most suitable calendar density.

Calendar interval size
- This will allow a practice to choose the ideal interval between appointments.

Provider selection
- This will allow a practice with multiple providers to select/deselect the providers available at the practice.


