
How to do a Manual RA Capture.
Manual (Paper) RAs are remittances sent directly to the practice by the schemes because they cannot be sent electronically.
How to capture a manual remittance advice.
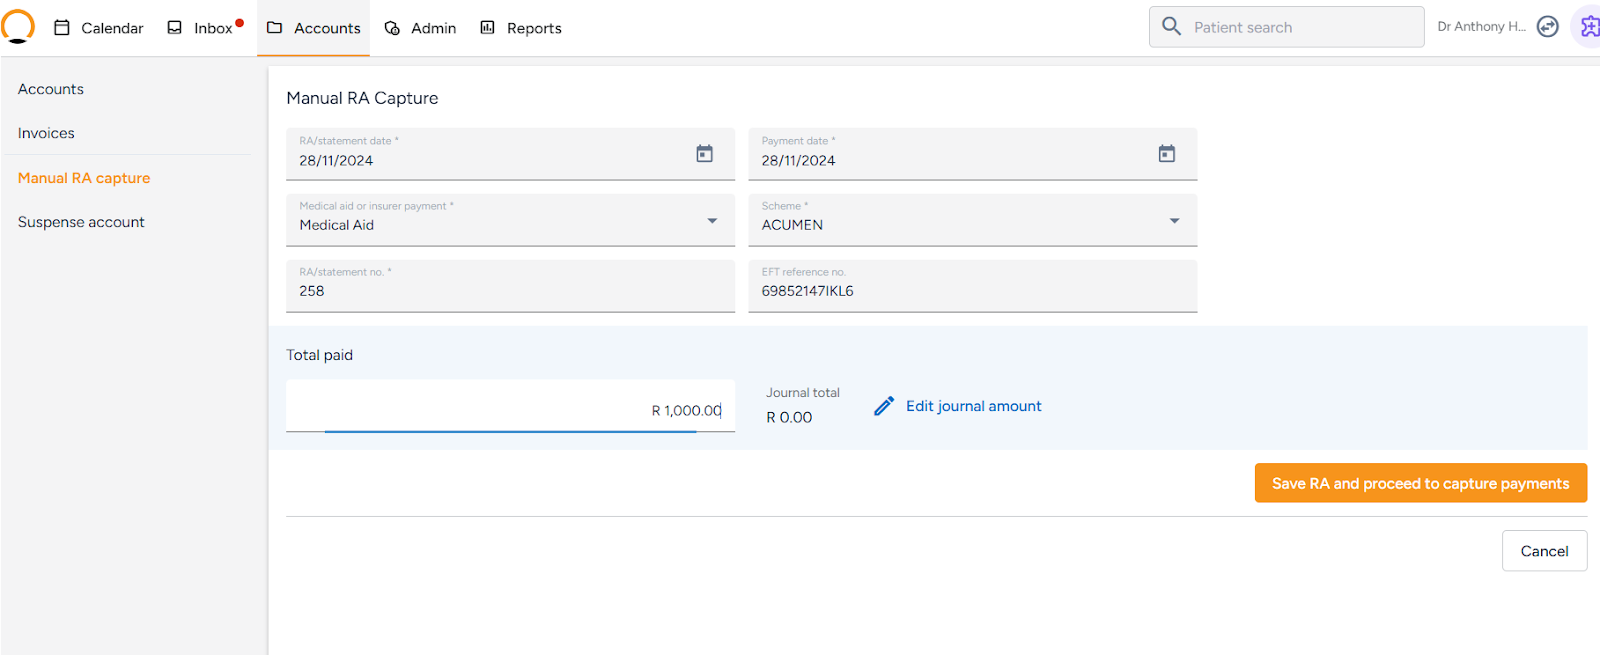
- Navigate to the “Accounts” tab.
- Select the “Manual RA capture” option.
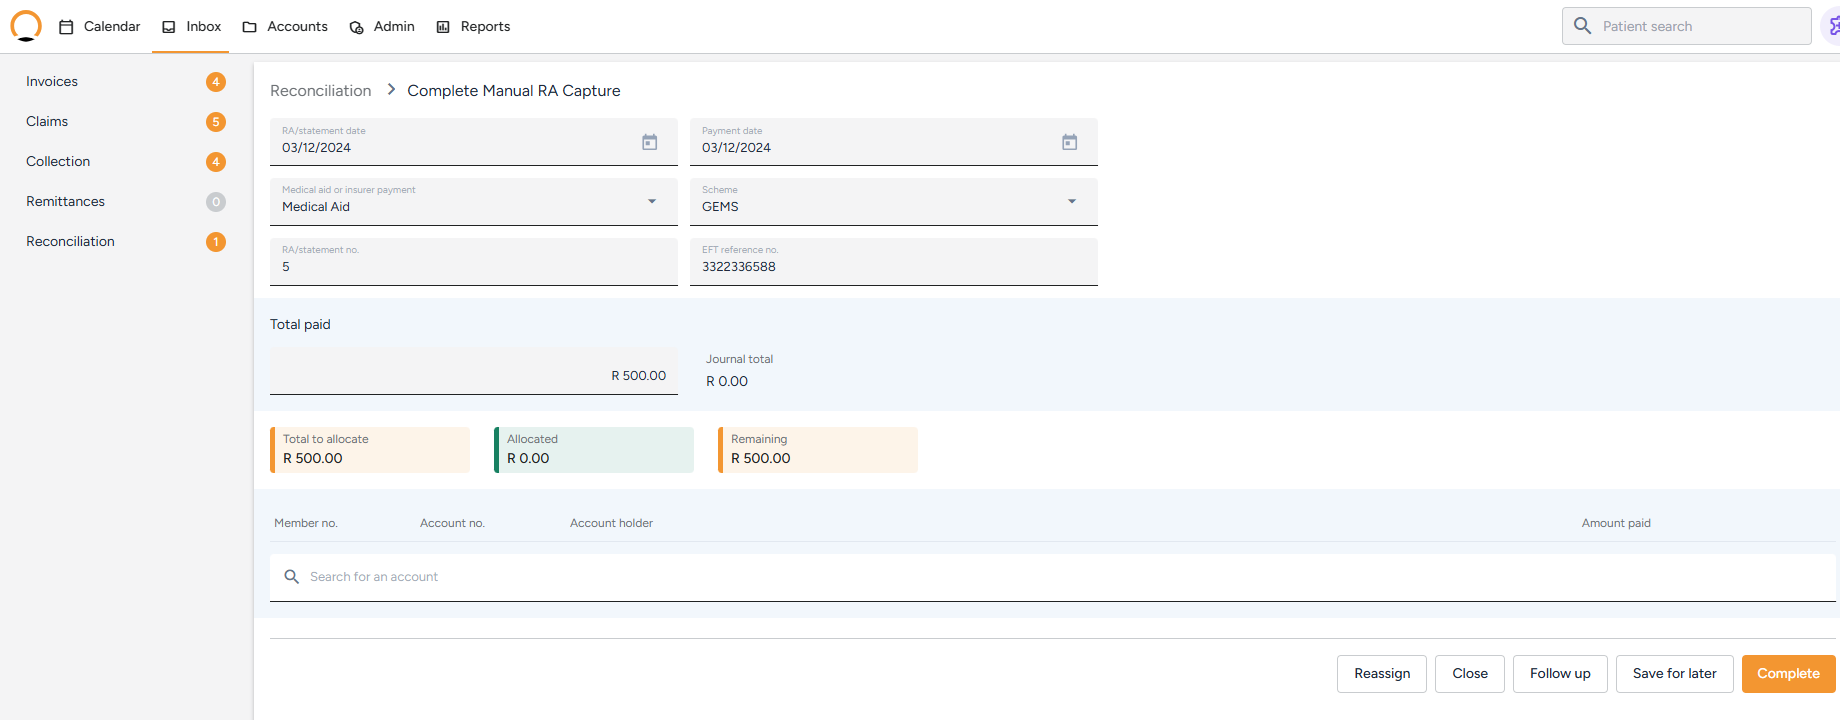
- Complete the required RA information.
- Statement Date: The date on the RA.
- Payment Date: The date payment was received.
- Medical Aid/Insurer: Select the medical aid or insurer from the dropdown.
- RA Statement Number: Enter the unique statement number from the RA.
- EFT Reference Number: Input the payment reference.
4. Once the required information has been captured the user can allocate payments as needed.
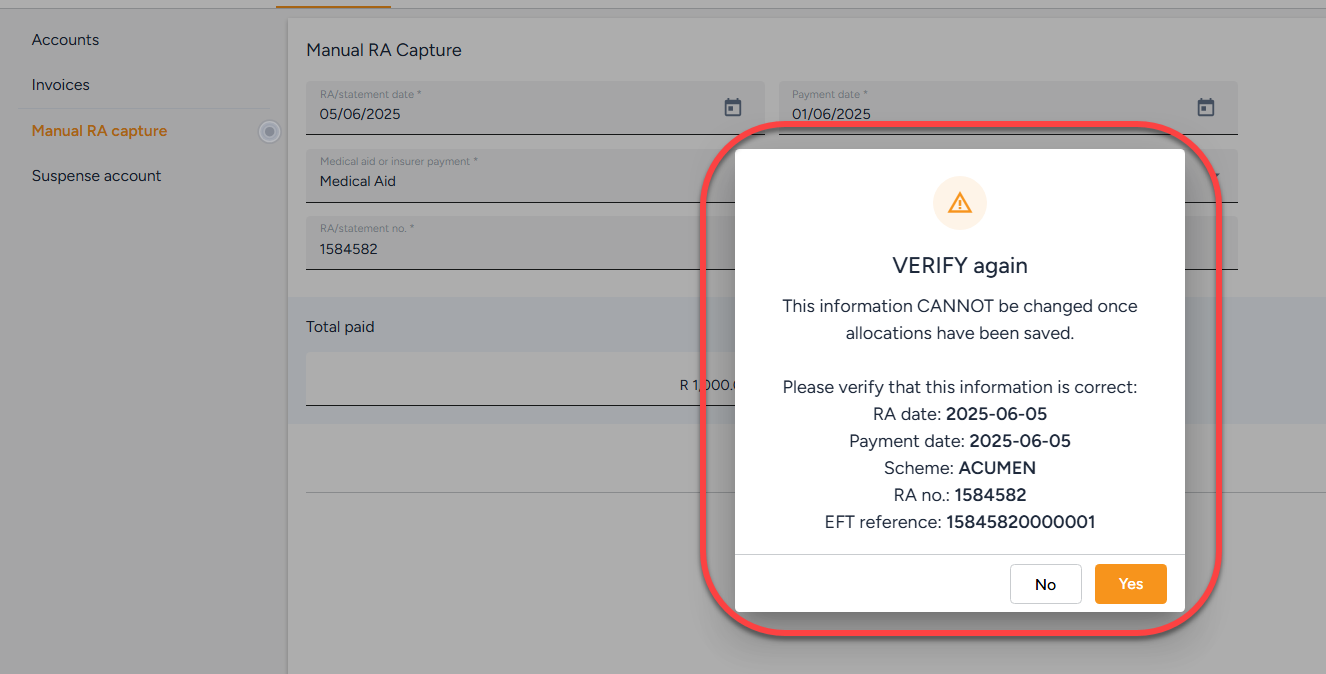
5. Extra verification is now required to save a manual RA header info. this additional step will ensure users validate their work before committing it.
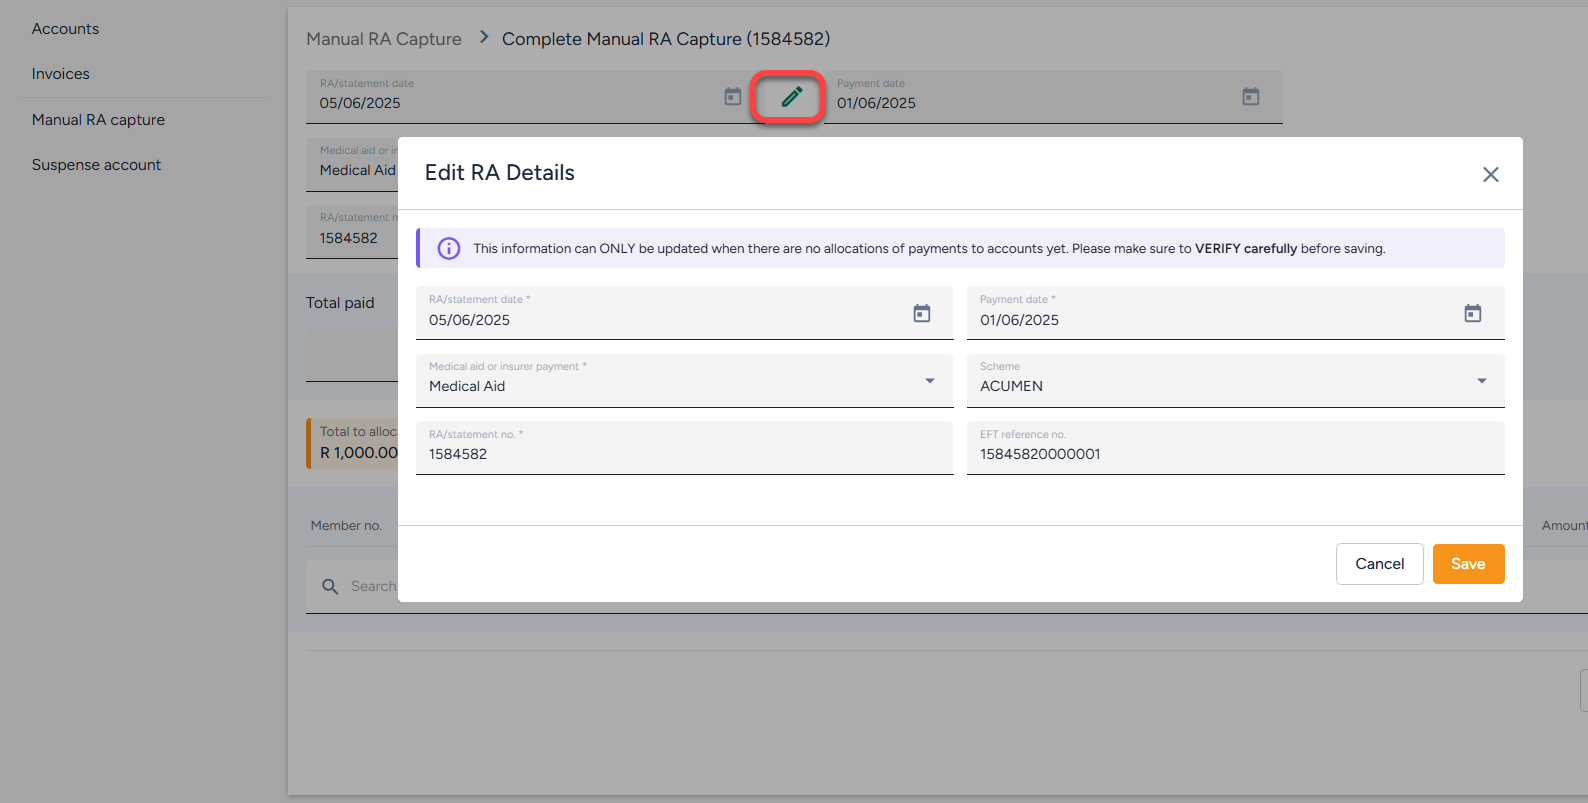
6. You can now edit RA header fields (excluding total and journal amounts) before any account allocations have been made. The user can simply click on the "pencil" icon to edit the fields and save the changes.
How to allocate payments.
- Once the RA information has been captured the user can select ”Save RA and proceed to capture payments”.
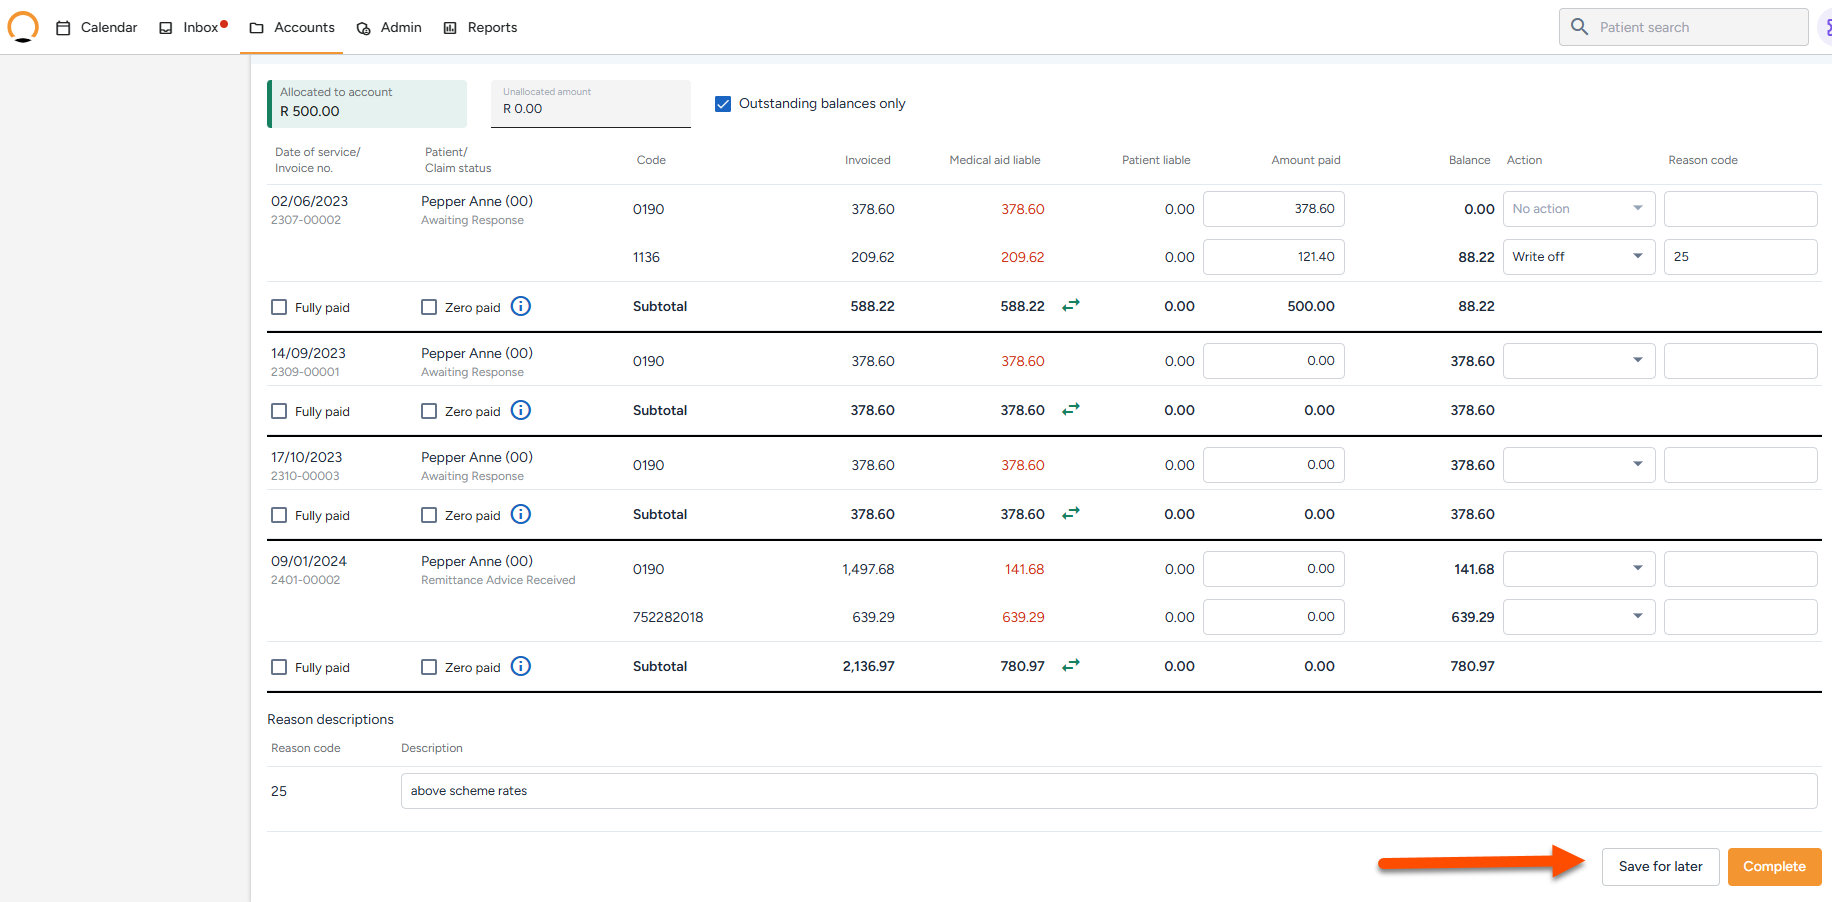
- Search the account and allocate an amount to the required invoice in the "amount paid" field.
- Once the payment has been allocated to the account the user is required to “commit” to the payment, before moving forward to the next.
- Once all payments have been allocated or "Committed" the user can select “Complete” to finish the manual RA.
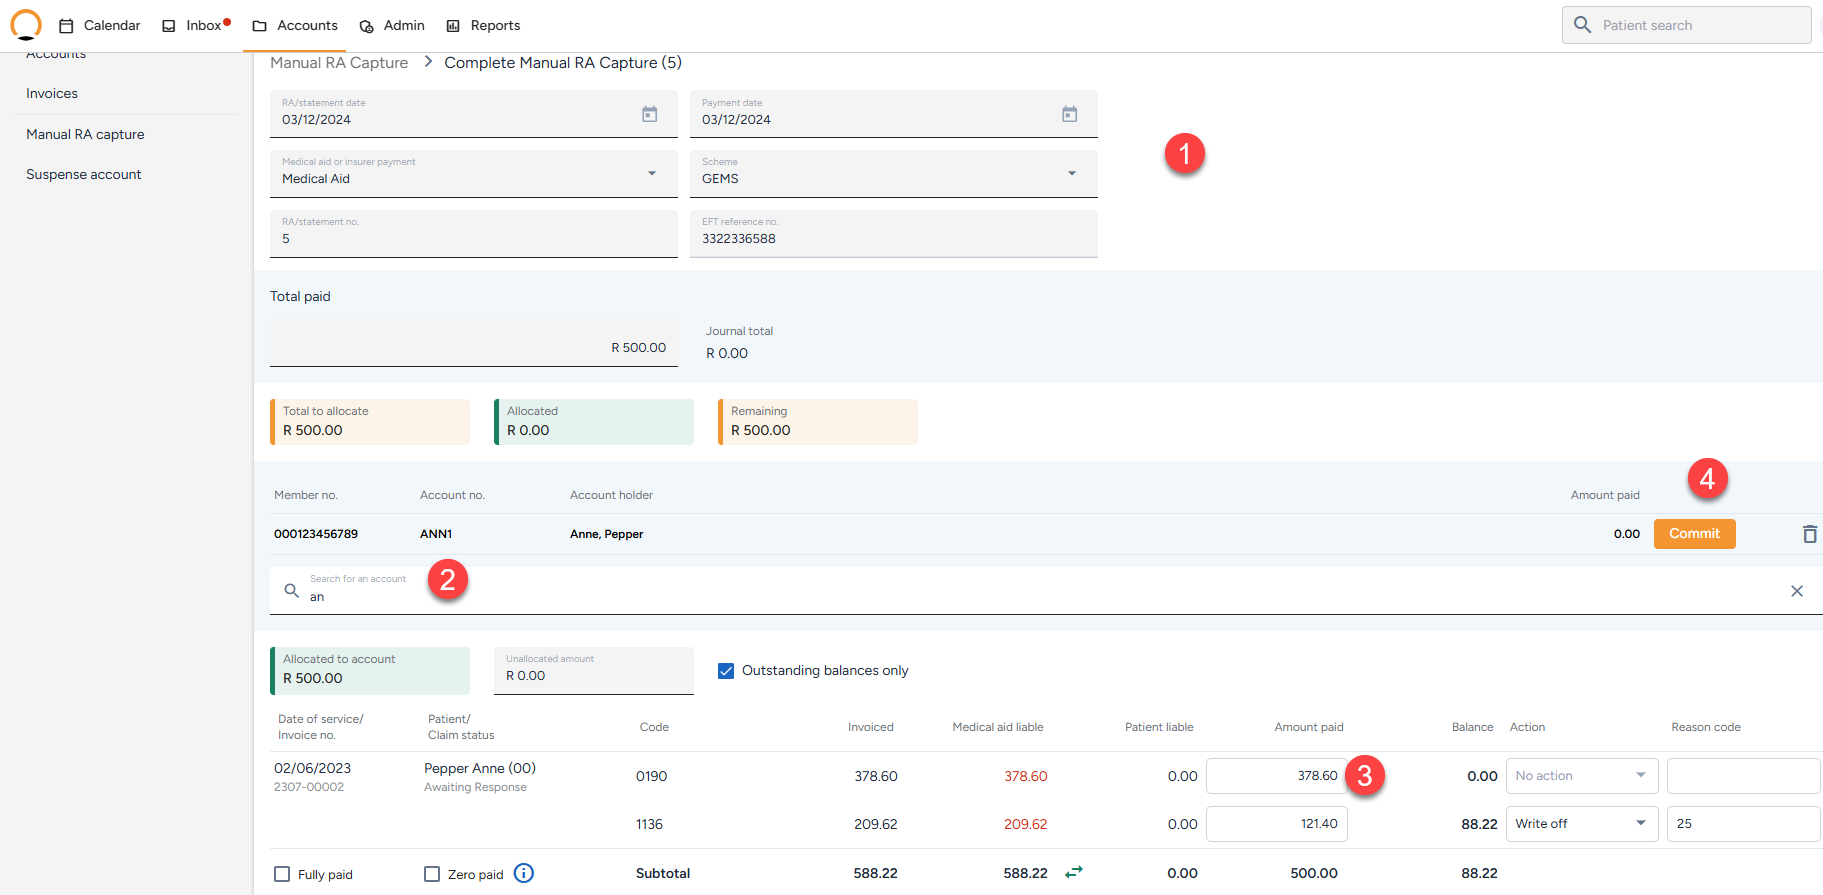
Please take note of the following:
- The user can add the reason codes as required.
- The user can also choose non-payment actions eg write off.
- The user must commit an allocation before moving on to the next.
How do you “Save for later” when capturing a manual RA.
This feature allows users to pause the Manual RA process without losing progress. Payments that have been partially entered or allocated can be saved and resumed later.
- Once all relevant data has been captured the user selects “Save RA and proceed to capture payments” They have the option to allocate payments immediately or “Save for Later”.
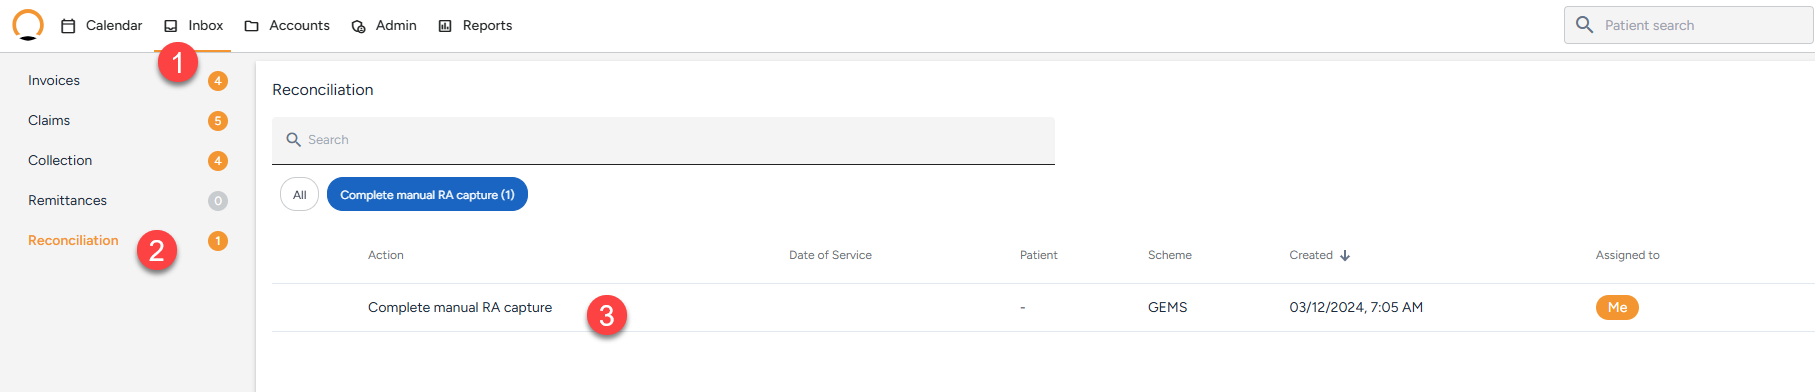
To access the RA’s that have been “Saved for Later”.
- Select the “Inbox” tab
- Navigate to “Reconciliation” and select the required RA.
- Open the RA and resume allocations.
How to reverse allocated payments.
If a payment was already "committed" in error the user can follow these steps to rectify the error.
- Navigate to the “accounts” tab and locate the patient account that requires correction.
- Select “Transactions” and change “Type” to ‘Medical aid payment”.
- Locate the payment and “reverse” the transaction found under the "Actions" option.
- Once the transaction is “reversed”, you can locate the item in the “Suspense Account” to be actioned as required.

Note: Once a payment is reversed the RA can ONLY be located in the “Suspense account” for further action. This means that the allocation can not be done from the inbox.