
How to Customize the Calendar in Healthbridge Nova
Follow these steps to customize provider colors, appointment display, and calendar preferences in Healthbridge Nova.
1. How to Customize Provider & Branch Colors
- Log in to Healthbridge Nova.
- Navigate to the ‘Calendar’ tab.
- Click on the ‘Settings’ button located above the calendar.
- Select ‘Colour Preferences’.
- Click on the color box next to the provider's name to change their assigned color.
- To select a custom color, click ‘More Colours’.
- Click ‘Save’ to apply the changes.
Providers now have custom colors on the calendar!
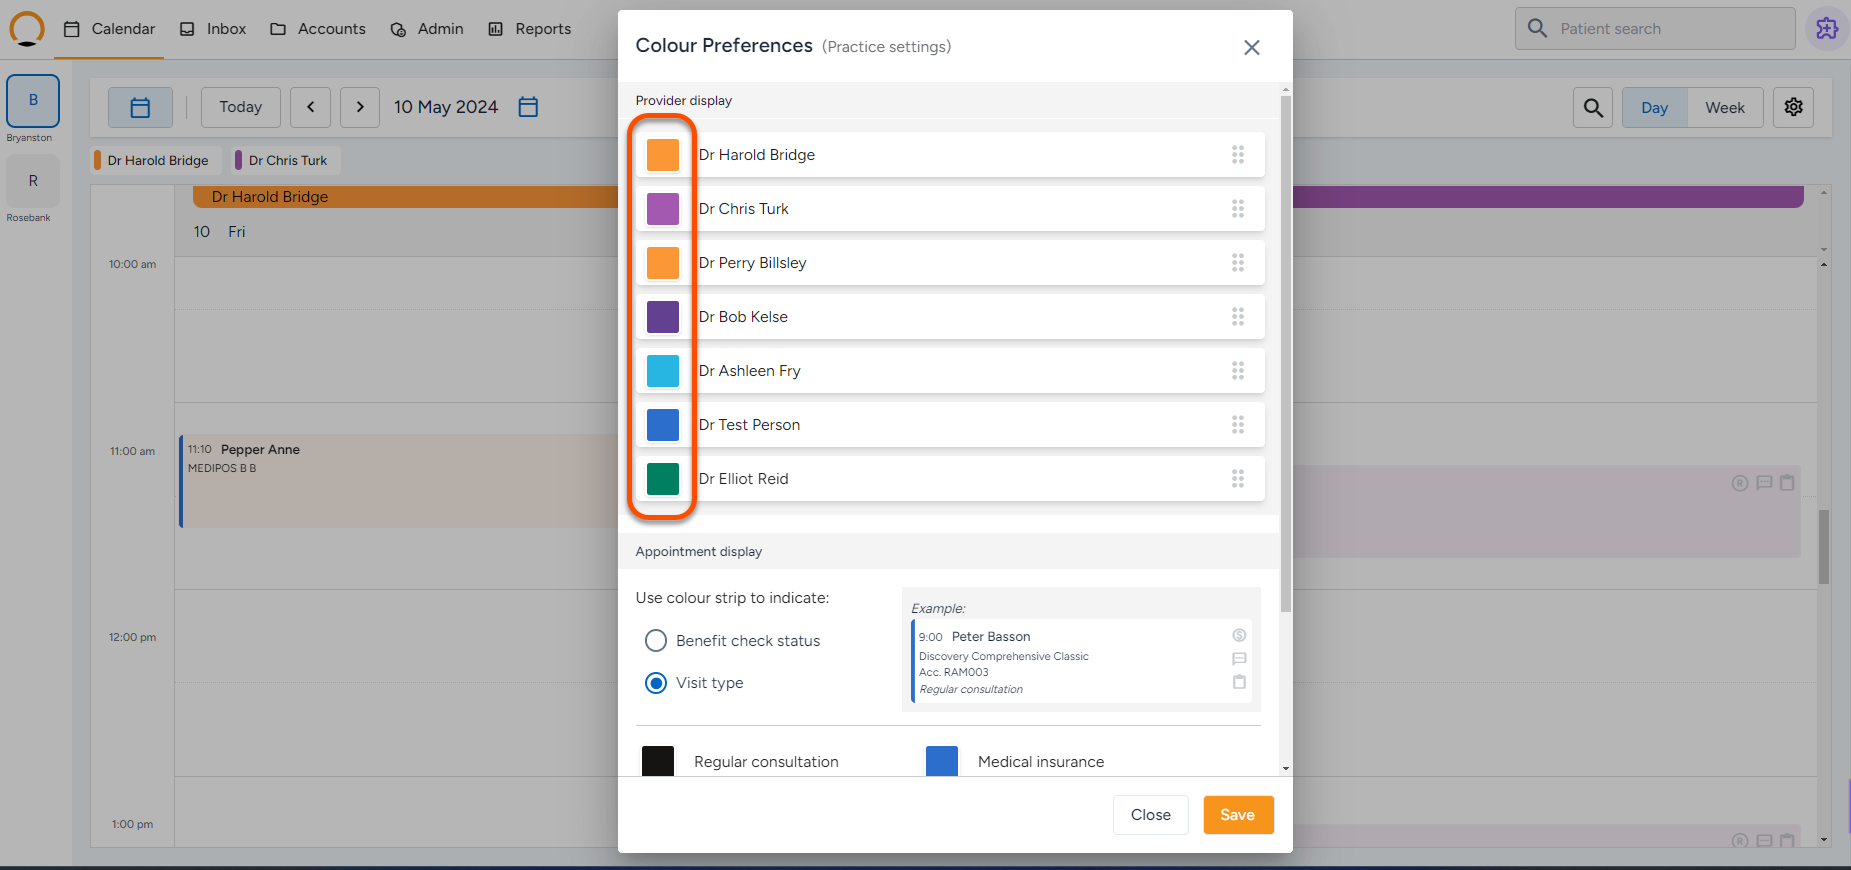

2. How to Customize Appointment Display Colors
- Click on the ‘Settings’ button above the calendar.
- Select ‘Colour Preferences’.
- Choose how appointment colors are assigned:
- Benefit Check Status → The color strip per appointment automatically updates based on the scheme response.
- Visit Type → Manually assign colors to different appointment types.
- Click ‘Save’ to confirm the changes

Appointment display colors are now customized!
3. How to Customize Calendar Display Preferences
- Click on the ‘Settings’ button above the calendar.
- Select ‘Display Preferences’.
- Adjust the following settings based on your practice’s needs:
- Density Preference → Choose the best calendar density for easier viewing.
- Calendar Interval Size → Set the ideal time interval between appointments.
- Provider Selection → For multi-provider practices, select/deselect which providers appear on the calendar.
- Click ‘Save’ to apply changes.
The calendar is now customized to match your practice's workflow! ⚙️
Click below to watch a video on how to customise your calendar