How to Send Bulk Messages in Healthbridge Nova
Bulk messaging allows practices to communicate with multiple patients at once via email or SMS. This feature can be used for important announcements, patient statements, or special offers.
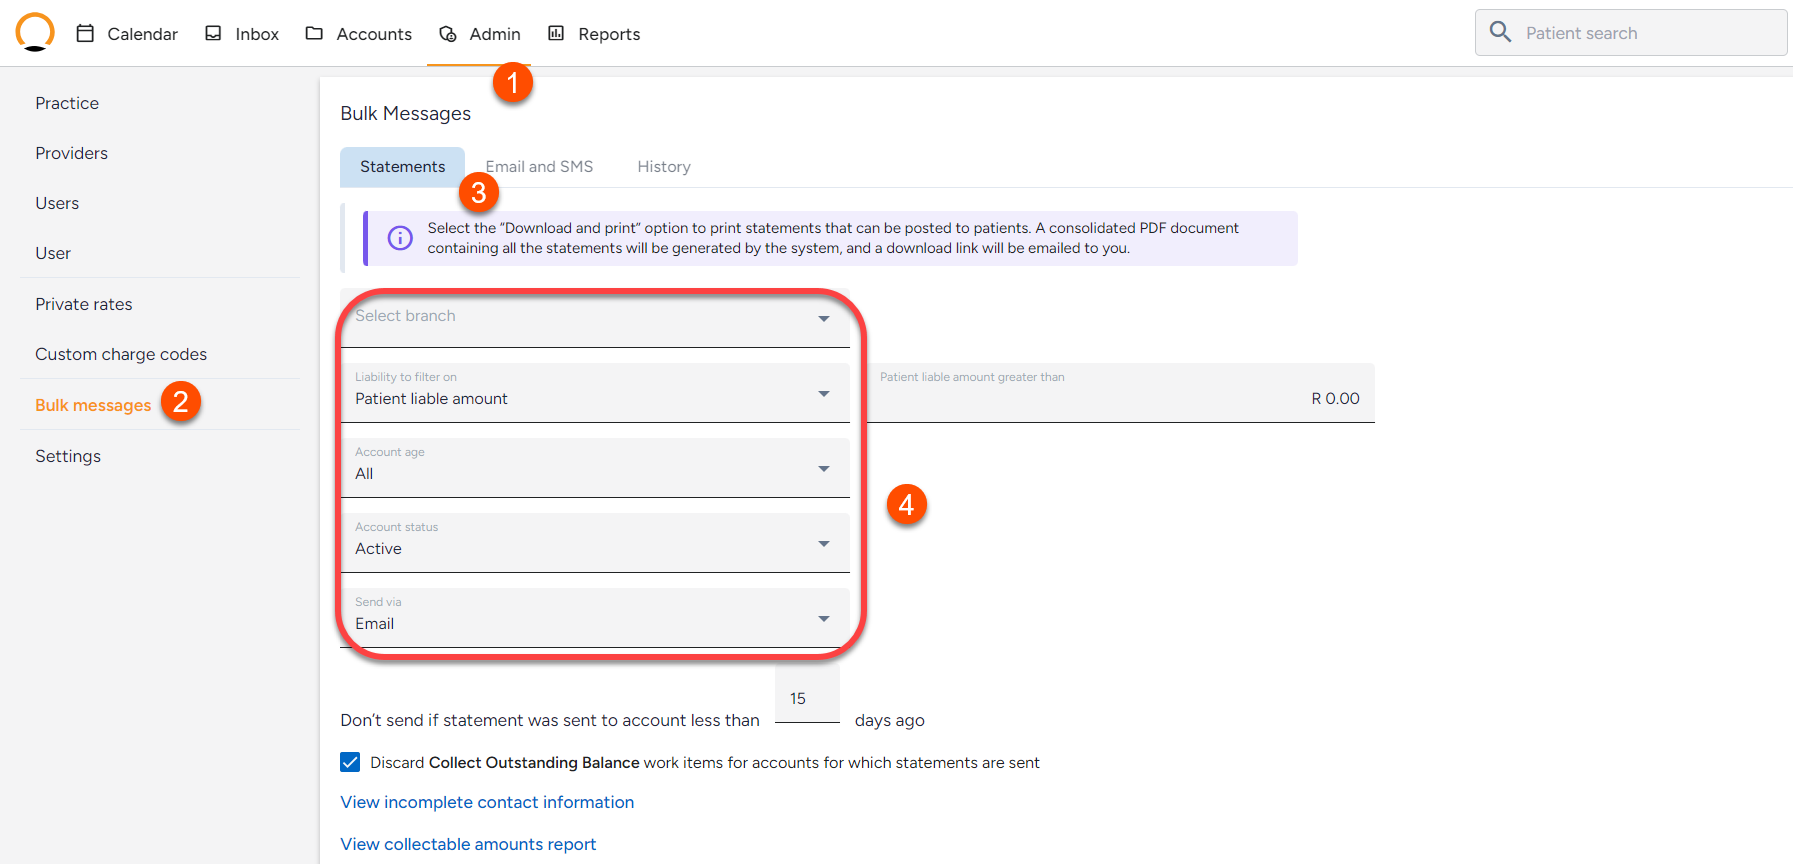
How to Send Bulk Statements
- Log in to Healthbridge Nova.
- Click on the ‘Admin’ tab from the main menu.
- Select ‘Bulk Messages’ from the left-hand panel.
- Click on ‘Statements’ to send bulk patient statements.
- Complete all required fields and filters to target the correct patient group.
- Click ‘Send Statements’ to deliver the statements to the selected patients.
Bulk statements have been successfully sent!
How to Send Bulk SMS and Emails
- Click on the ‘Admin’ tab from the main menu.
- Select ‘Bulk Messages’.
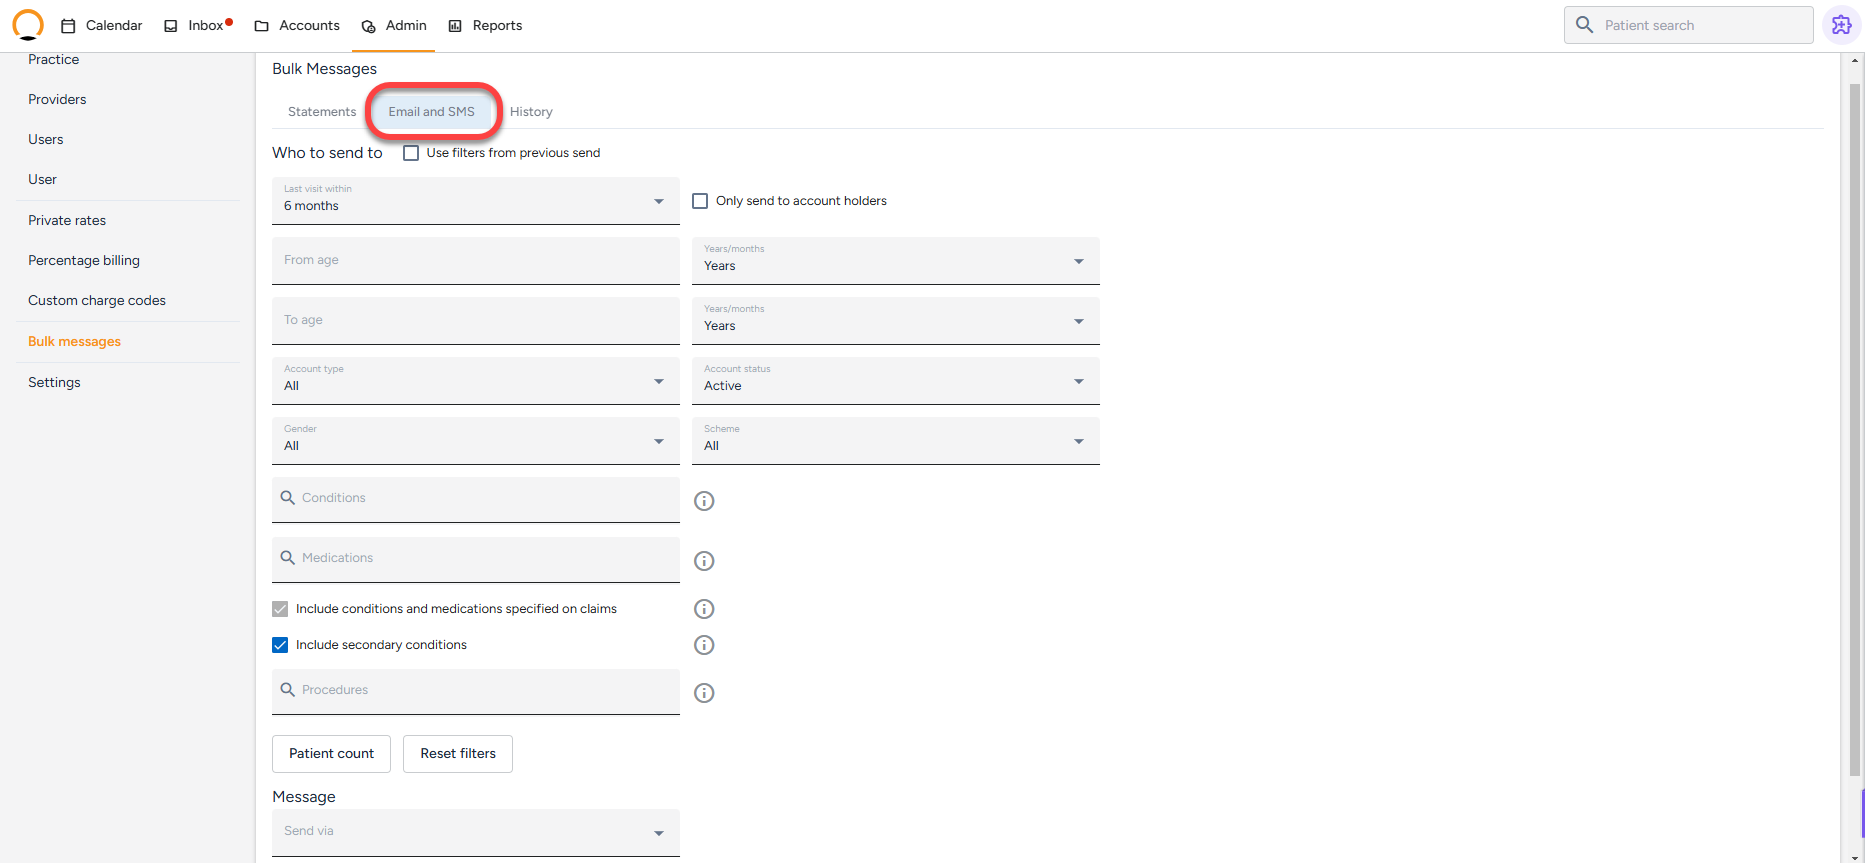
- Click on ‘Emails and SMS’ to send mass communications.
- Complete the required fields and filters to:
- Target a specific patient group.
- Include all patients if needed.
- Choose the message delivery method:
- SMS
- Review the remaining SMS balance (if applicable).
- If additional SMS credits are needed, purchase them before sending.
- Once all details are finalized, click ‘Send’.
Bulk messages have been successfully sent via Email/SMS!
How to Send Bulk SMS and Emails
- Click on the ‘Admin’ tab from the main menu.
- Select ‘Bulk Messages’.
- Click on ‘Emails and SMS’ to send mass communications.
- Complete the required fields and filters to:
- Target a specific patient group.
- Include all patients if needed.
- Choose the message delivery method:
- SMS
- Review the remaining SMS balance (if applicable).
- If additional SMS credits are needed, purchase them before sending.
- Once all details are finalized, click ‘Send’.
Bulk messages have been successfully sent via Email/SMS!
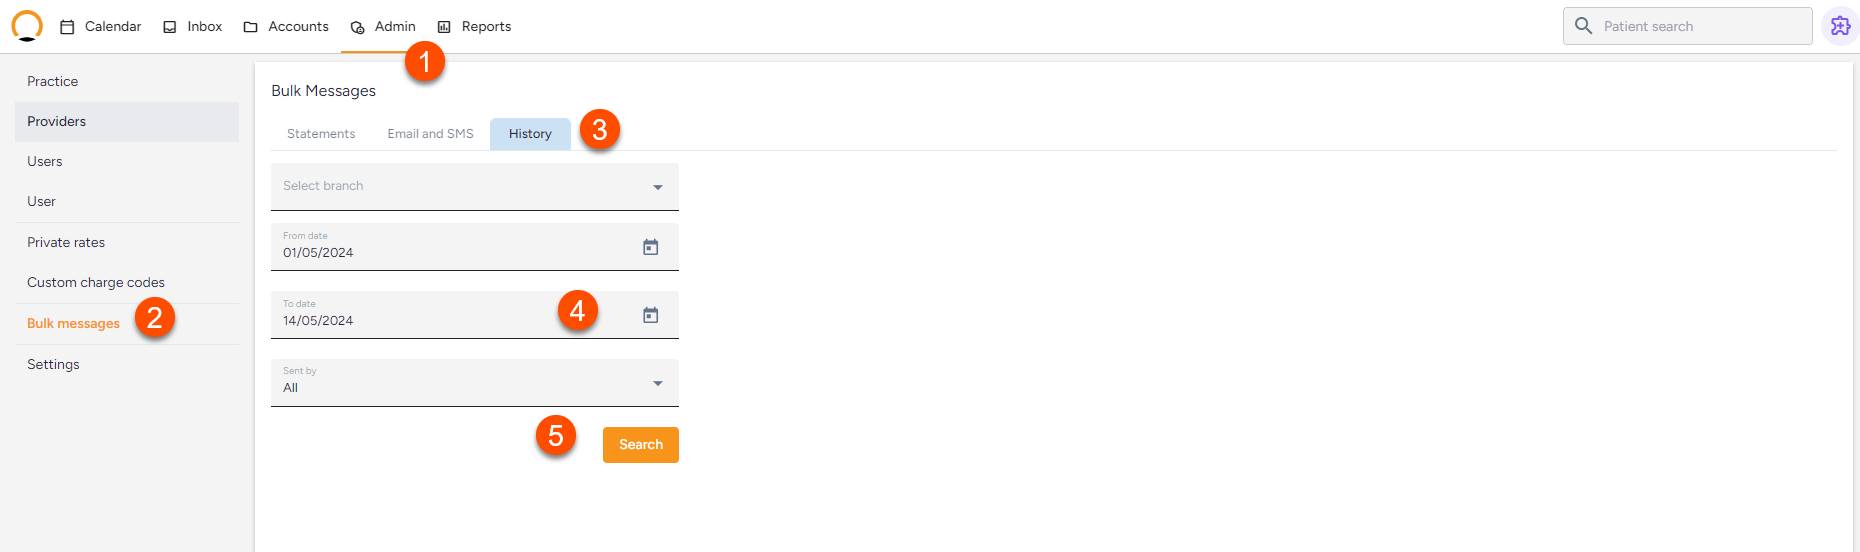
How to view the history of messages sent
- Select the“Admin” tab.
- Select the“Bulk Messages” option.
- Select the “History” tab.
- Ensure that all the required fields are completed.
- Click on “Search” and the data will become available.
Click here to watch a quick tutorial