
How to Capture an Invoice in Healthbridge Nova
Invoices can be generated in multiple ways, including automatically after a consultation or manually from the patient’s account. Follow these steps to capture an invoice efficiently.
Step 1: Choose a Method to Capture the Invoice
Option 1: After a Completed Appointment
- Log in to Healthbridge Nova.
- Navigate to the ‘Waiting Room’.
- Click ‘Check-Out’ after the patient’s appointment.
- A pop-up will appear prompting you to finalize the invoice.
- Click ‘Yes’ to proceed.
Option 2: Manually from the Patient’s Account
- Navigate to the ‘Accounts’ tab.
- Click on ‘Accounts’ in the left-hand panel.
- Search for the patient’s account and select their name.
- Click ‘Capture Invoice’.
Option 3: Quick Access via Quick Launch Menu
- Click on the Quick Launch Menu.
- Select ‘Capture Invoice’.
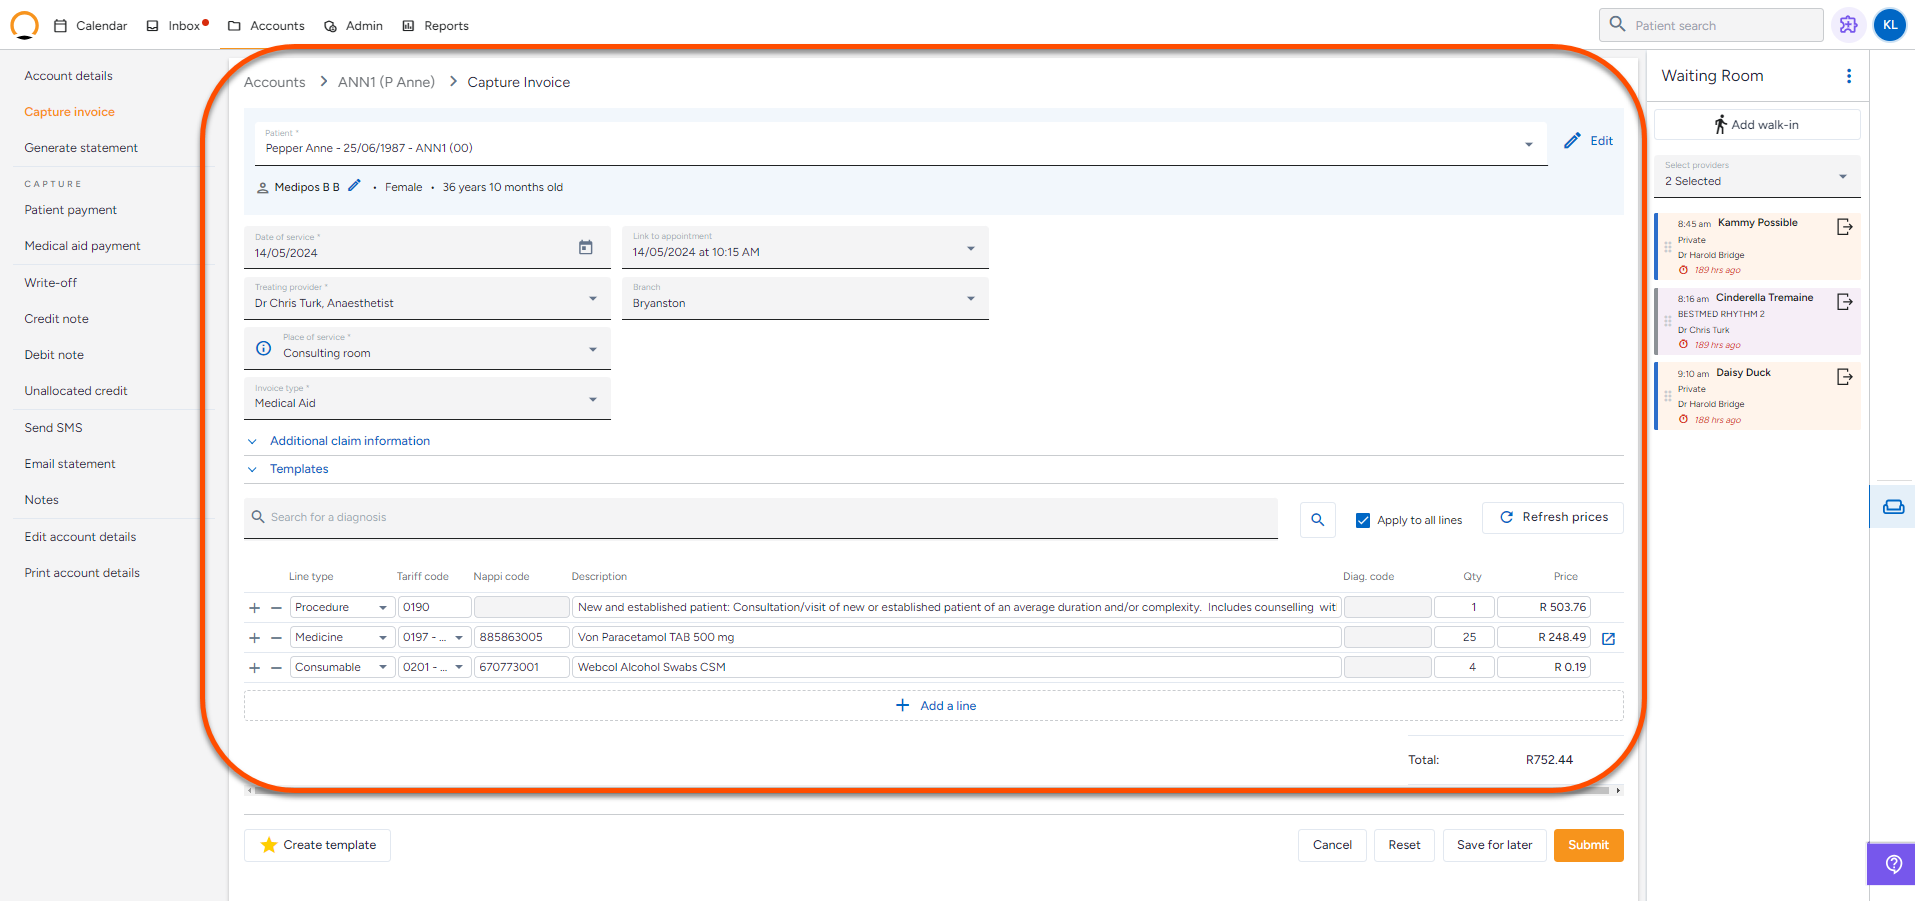
Step 2: Enter Invoice Details
- Fill in the following required fields:
- Date of Service → Auto-filled with today’s date.
- Link to Appointment → Select the appointment (if applicable).
- Place of Service → Default is ‘Consulting Room’.
- Branch → Select the relevant practice location.
- Treating Provider → Choose the doctor or provider.
- Invoice Type → Select Cash or Medical Aid.

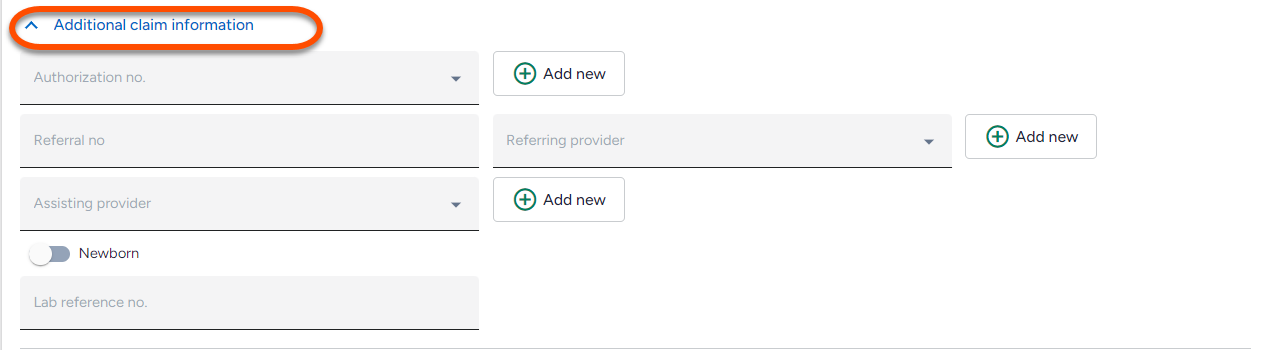
Step 3: Add Additional Claim Information (If Required)
- If applicable, enter:
- Authorization Number (if required by medical aid).
- Referring Provider (if applicable).
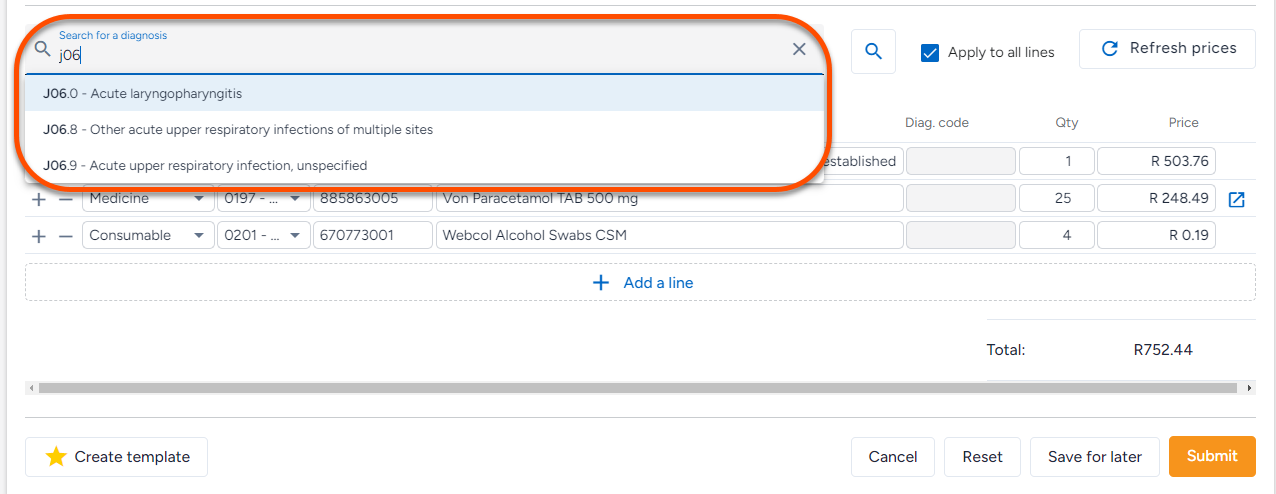
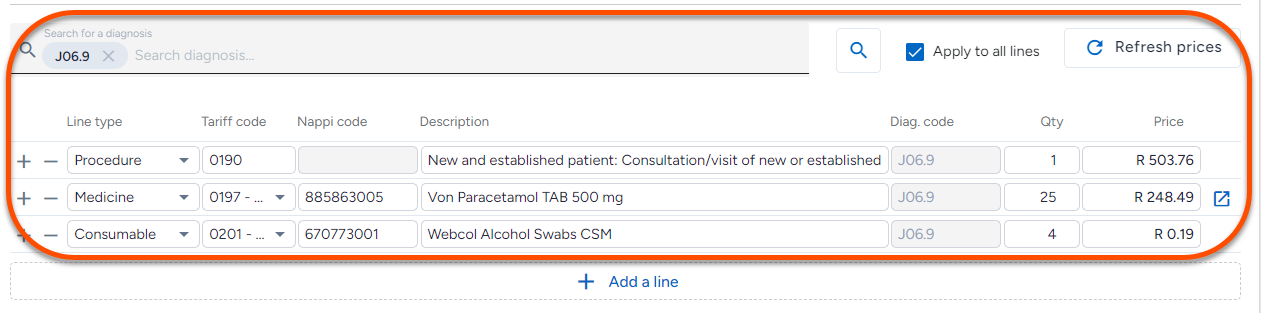
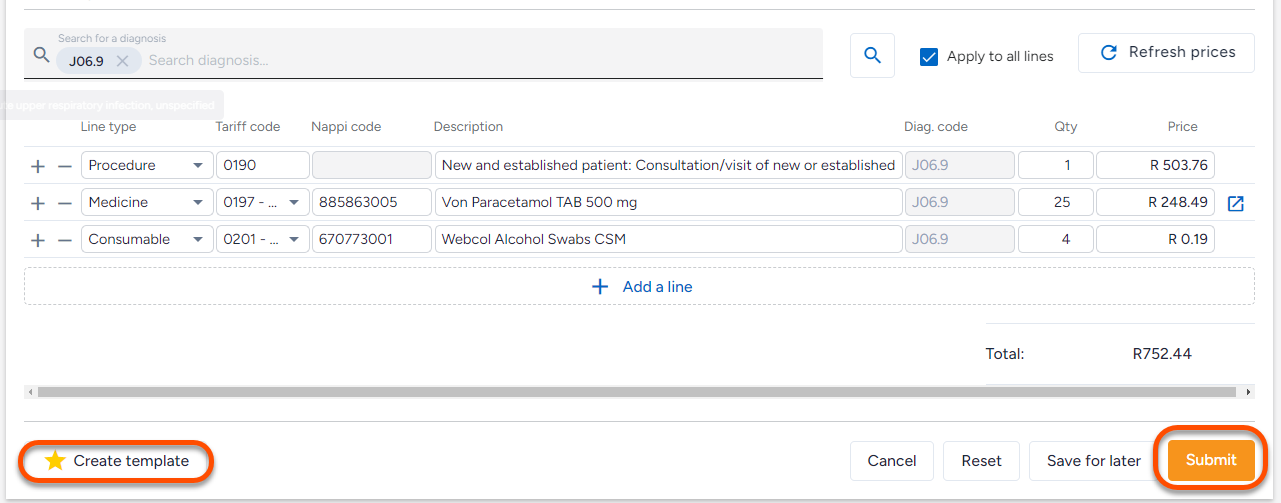
Step 4: Enter Diagnosis and Billing Information
- Enter the Diagnosis Code:
- If known, enter the code directly.
- If unknown, click the search icon to find it by description or code.
- Complete the Invoice Line Items:
- Click on the Line Type dropdown.
- Enter the Tariff Code.
- Enter the Nappi Code (for medicines or consumables).
Step 5: Finalize and Save the Invoice
- Click ‘Submit’ to save the invoice.
- Optional: If this claim is frequently used, click ‘Create Template’ to save the details for future use.
The invoice has been successfully captured in Healthbridge Nova!
NOTE: Healthbridge Nova allows one invoice to include multiple line items of procedures, medications, and consumables. However, claims are processed per invoice and cannot be submitted as multiple claims at once.
Click below to watch a quick tutorial