
How to Perform a Benefit Check in Healthbridge Nova
A Benefit Check verifies a patient’s medical aid coverage and eligibility for services. This process is automated when a patient is booked into the calendar or added to the waiting room.
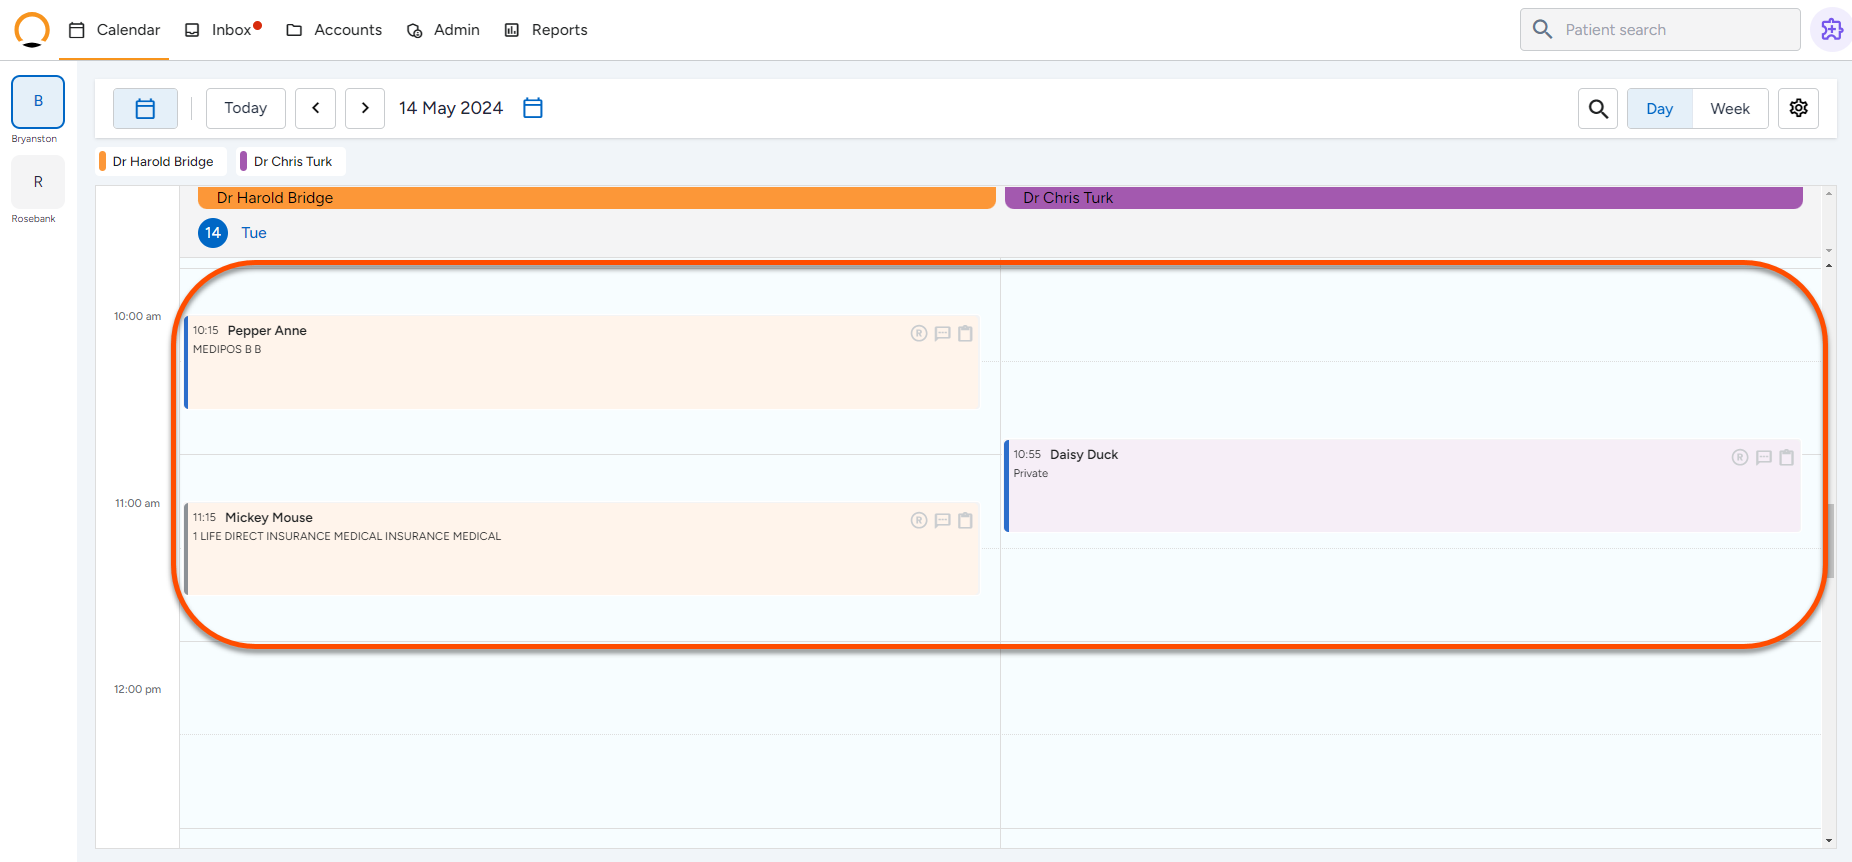
Step 1: Open the Calendar
- Log in to Healthbridge Nova.
- Click on the ‘Calendar’ tab.
Step 2: Book an Appointment
- Select the Branch, Provider, and Time Slot for the patient’s appointment.
- Follow the standard appointment booking process.
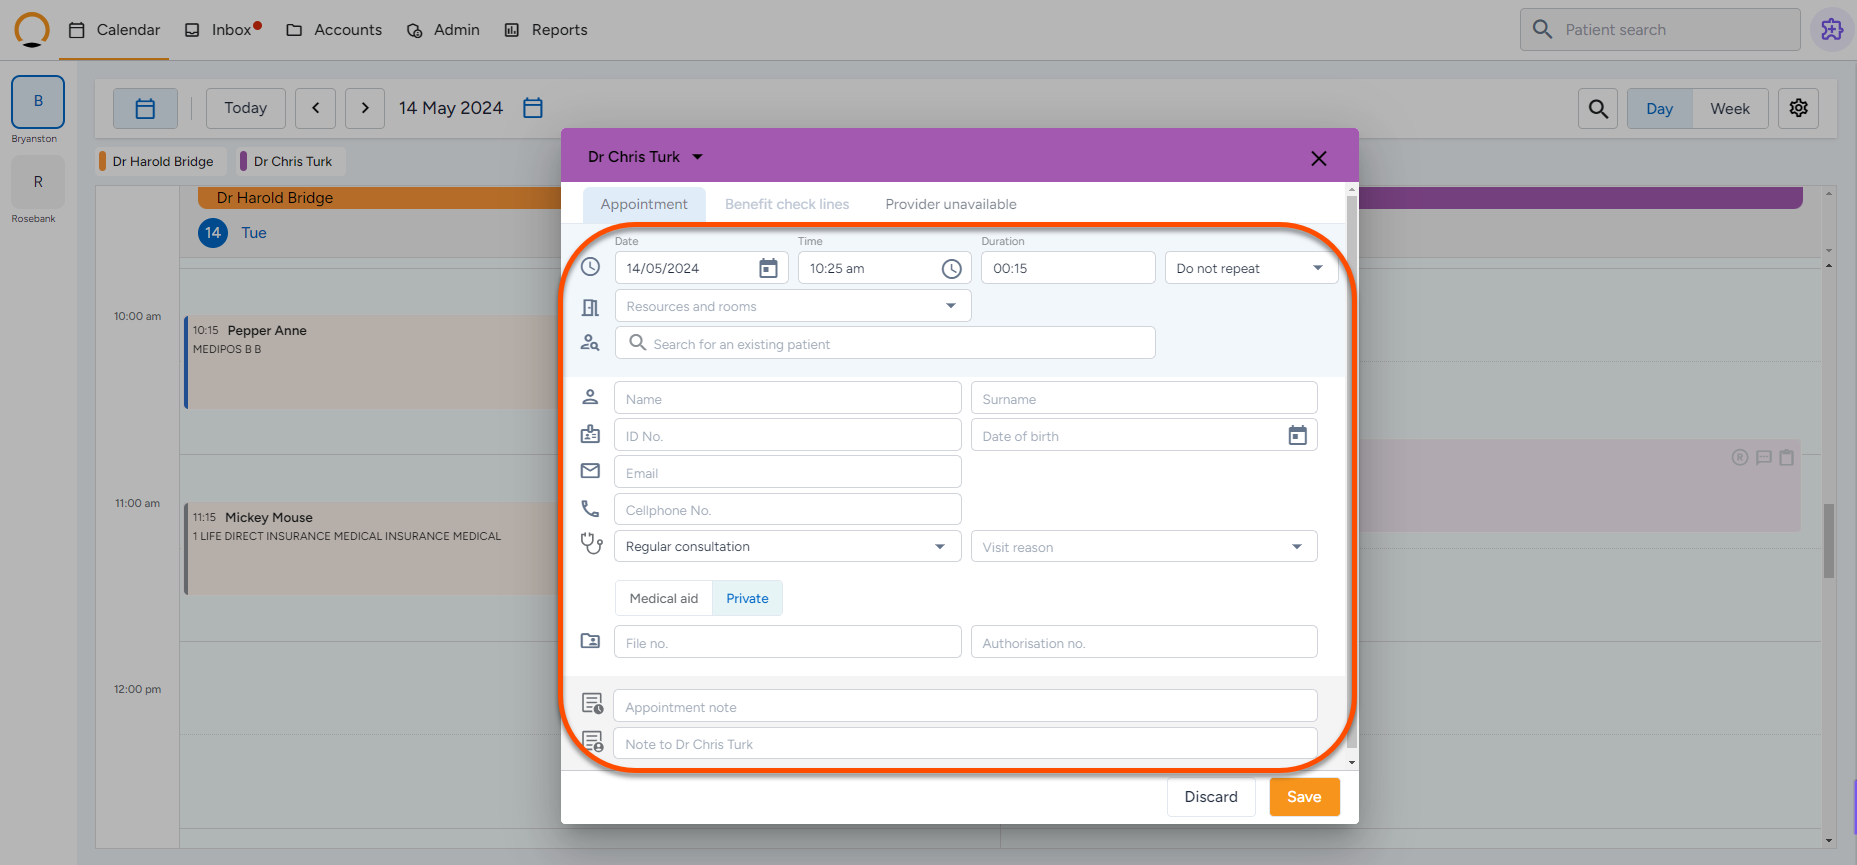
Step 3: Ensure All Required Fields Are Completed
- To trigger a Benefit Check, enter the following patient details:
- Name
- Surname
- Medical Scheme
- Member Number
- Dependent Code
- Date of Birth
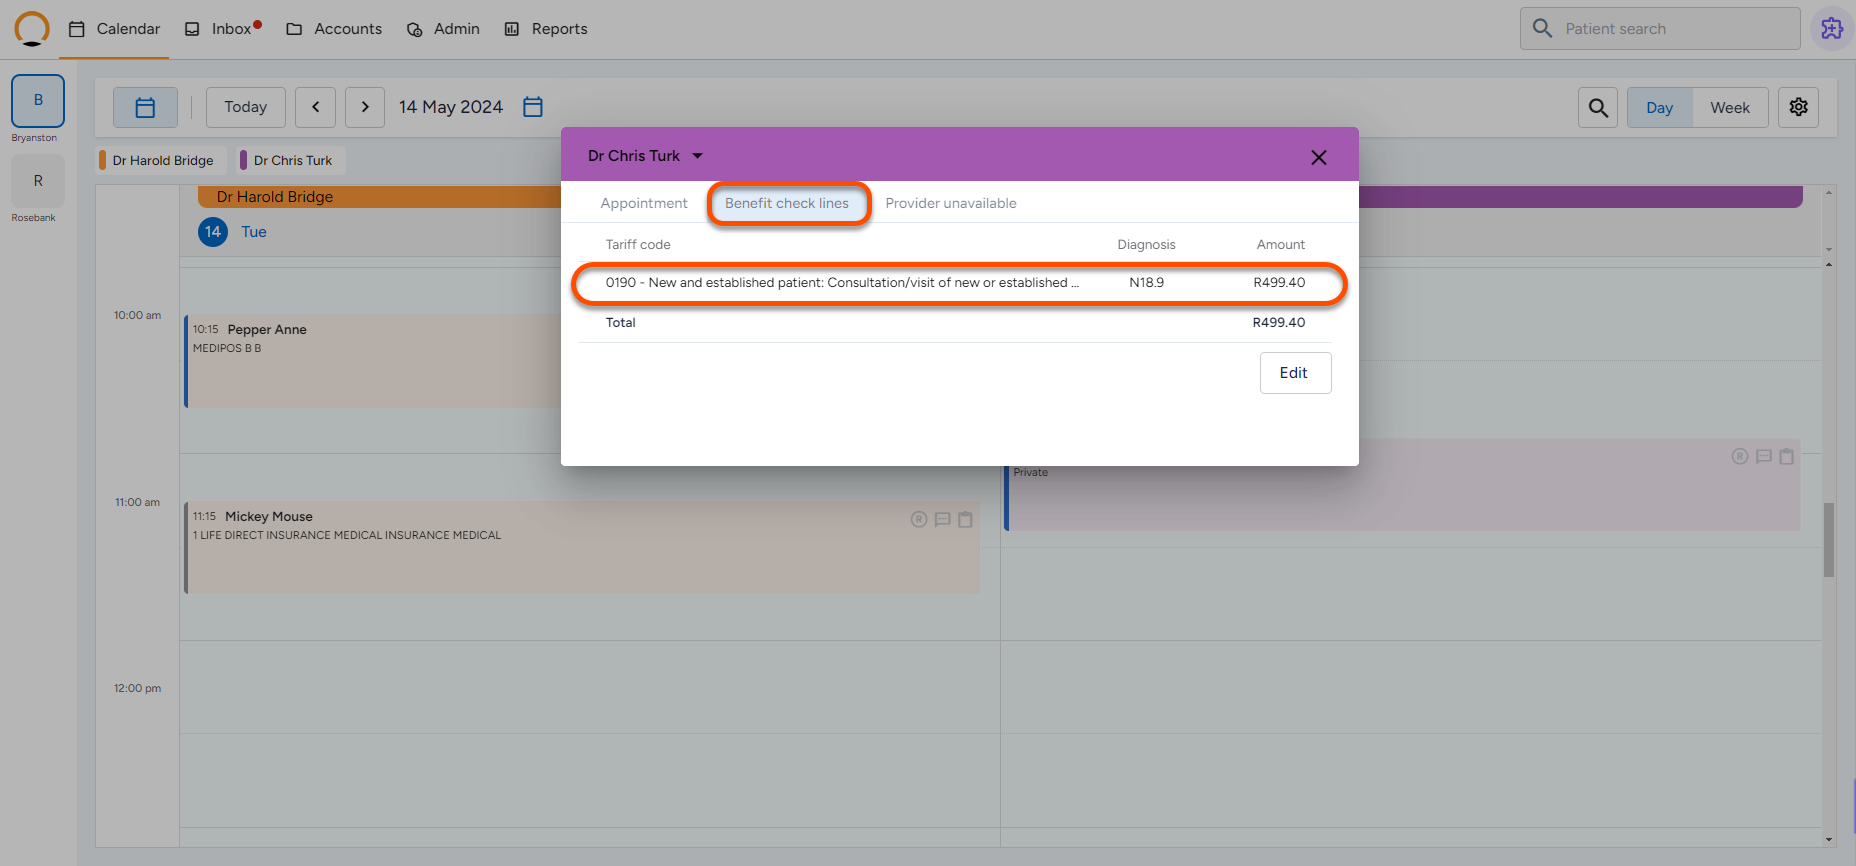
Step 4: View Benefit Check Tariff Codes (Optional)
- At the top of the appointment window, locate ‘Benefit Check Lines’.
- Review the default Tariff Codes used for the Benefit Check.
Step 5: Save and Trigger the Benefit Check
- Click ‘Save’ to finalize the appointment.
- If applicable, the system will automatically perform a Benefit Check.
Step 6: Interpret the Benefit Check Response
- The system will return a color-coded response:
- Green: Fully covered by medical aid.
- Yellow: Partially covered; patients need to cover the shortfall.
- Orange: Not covered; advice on payment methods.
- Red: Rejected due to invalid patient details; correct the information and resubmit.
- Grey: Response pending; typically resolved within the same day.
- Blue: No benefit check has been triggered yet; this may indicate a cash payment, missing data, or that the benefit check is pending based on trigger timing.
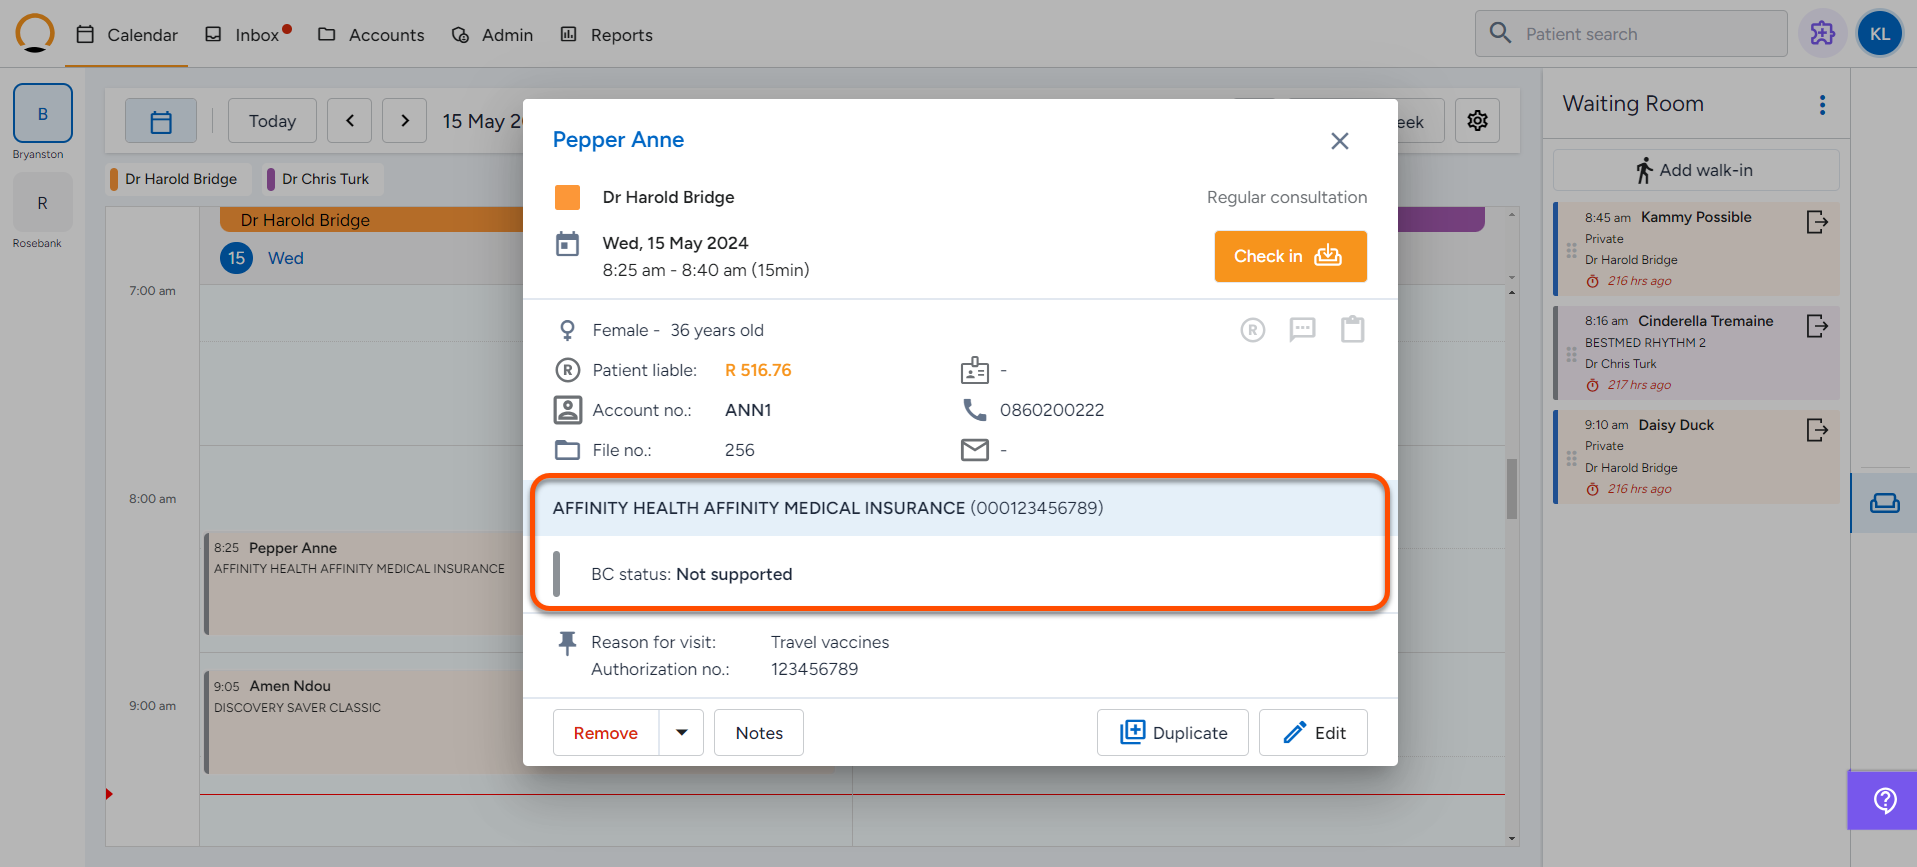
The Benefit Check is now complete! The response will be displayed in the appointment details.
Click below for a quick tutorial on how to do a benefit check