How to capture an invoice
There are multiple methods for obtaining an invoice, and commonly employed approaches are:
- After completing an appointment on the calendar and selecting 'check out' from the 'Waiting room,' a pop-up will prompt you to finalize the invoice for that appointment. Simply click 'Yes' to proceed.
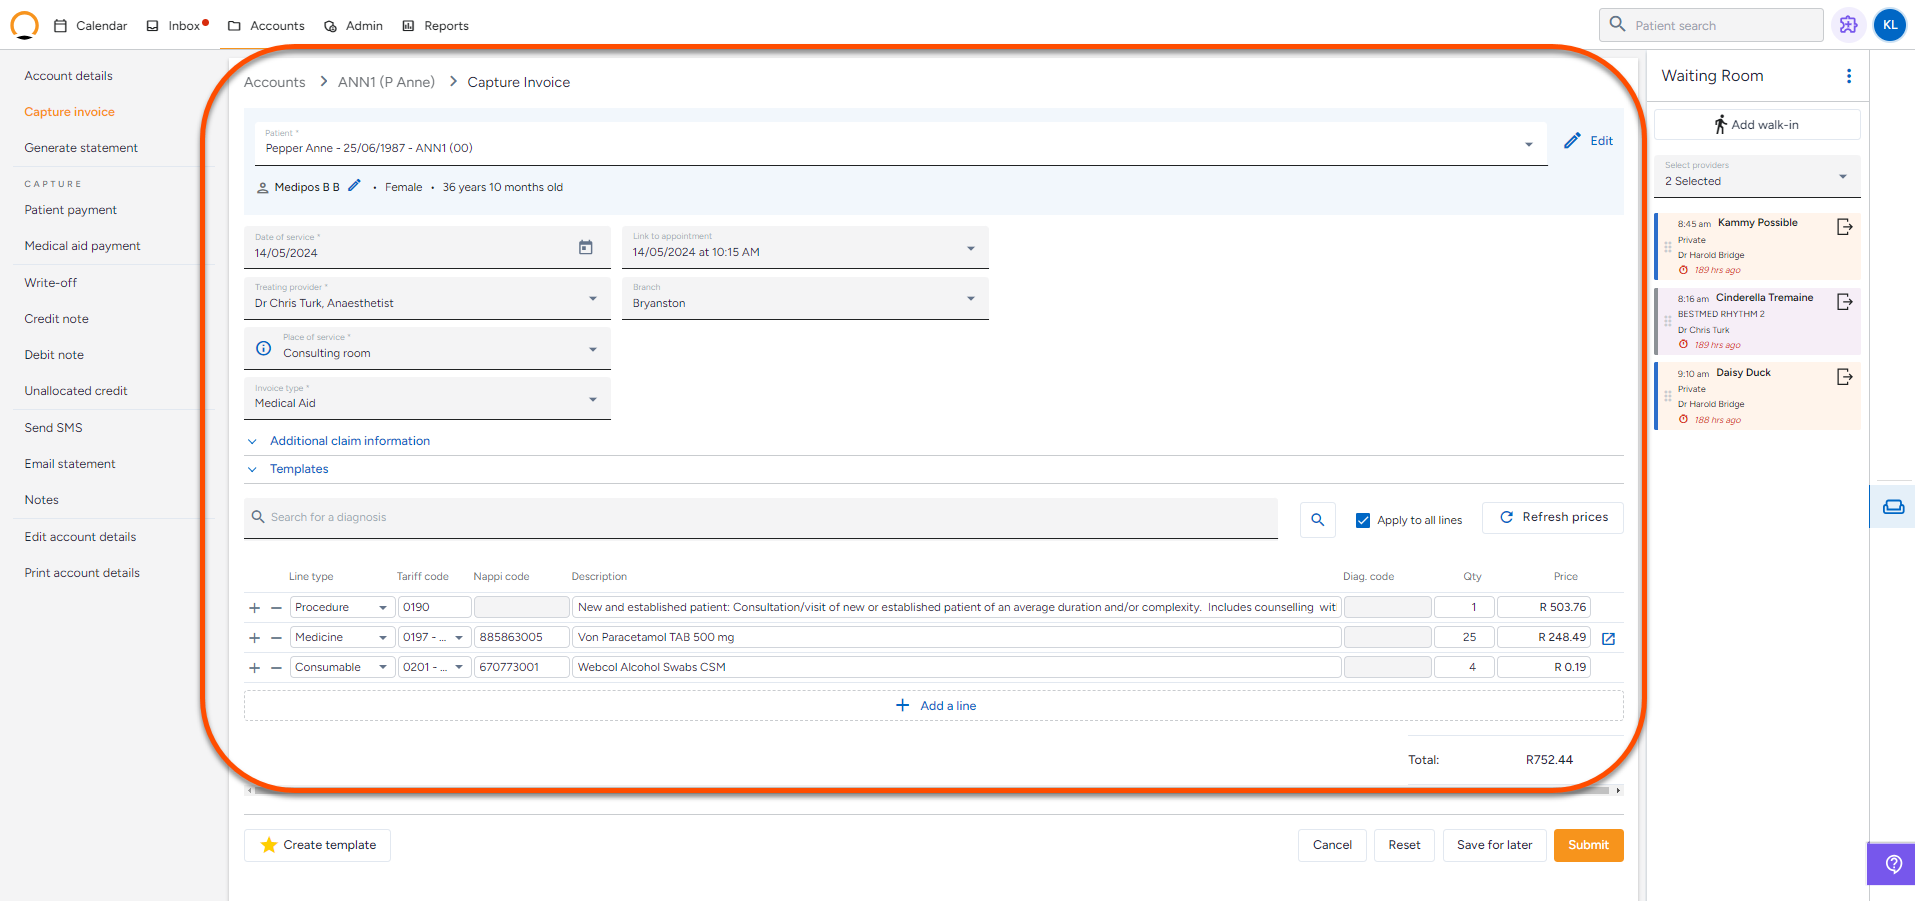
- Alternatively, you can navigate to the accounts tab, select 'accounts,' locate the specific account, and then click on the patient's name. The user can also, use the quick launch menu and choose "Capture invoice."
From your preferred method, click on ‘Capture invoice’.

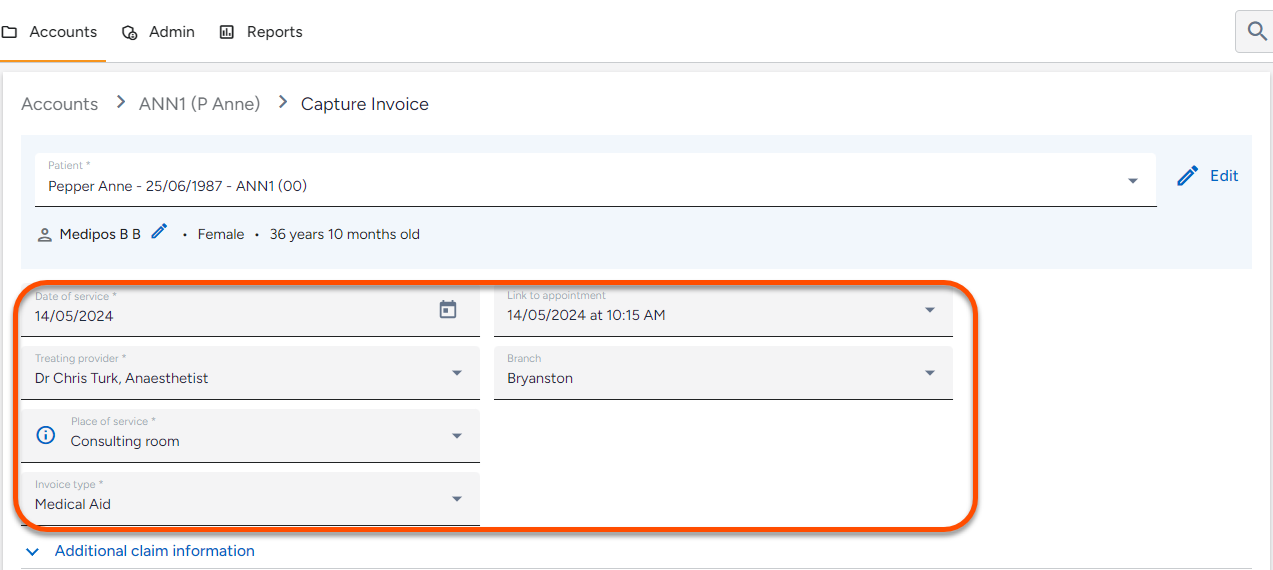
Add the required information:
- ‘Date of service’ - Today's date will be added automatically.
- 'Link to appointment' - Link the invoice directly to an appointment.
- ‘Place of service’ - The default is ‘Consulting room’.
- 'Branch' - Select the relevant branch.
- ‘Treating provider’ - Select the provider that you want to link to this invoice. If you change the provider after completing the invoice, note that all the invoice lines will be cleared.
- 'Invoice type' - Select your invoice type, either cash or medical aid.
Once the above information has been completed, the user can also add 'Additional claim information' if required for the claim, this could include an “Authorisation number”, or “Referring Provider” as indicated below.

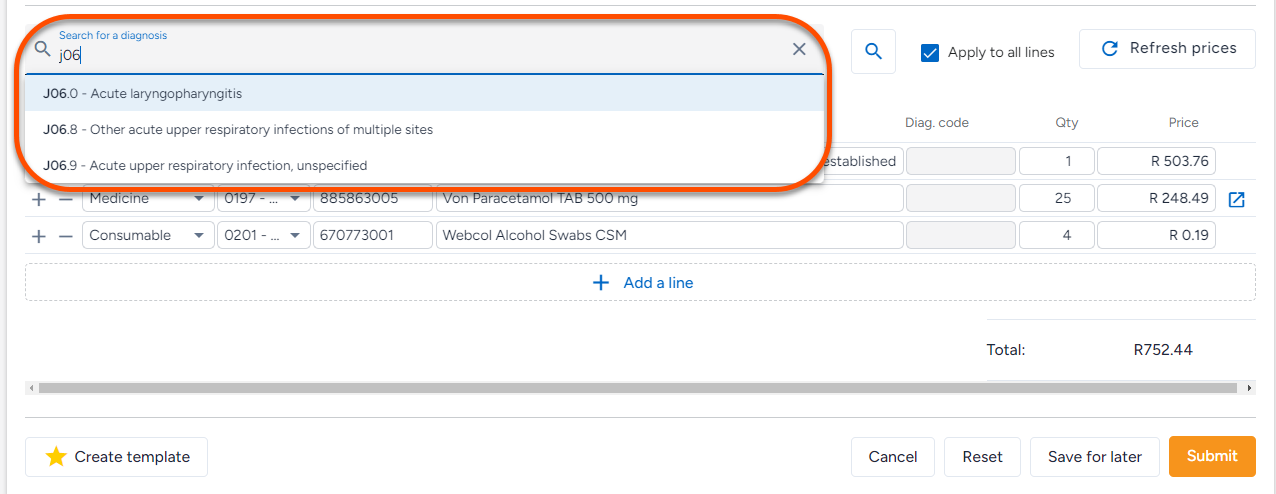
Enter the ‘Diagnosis code’. If you know the code, you can enter it directly. If not, you can search by description or by code. Clicking on the search icon will open a ‘Diagnosis’ window.

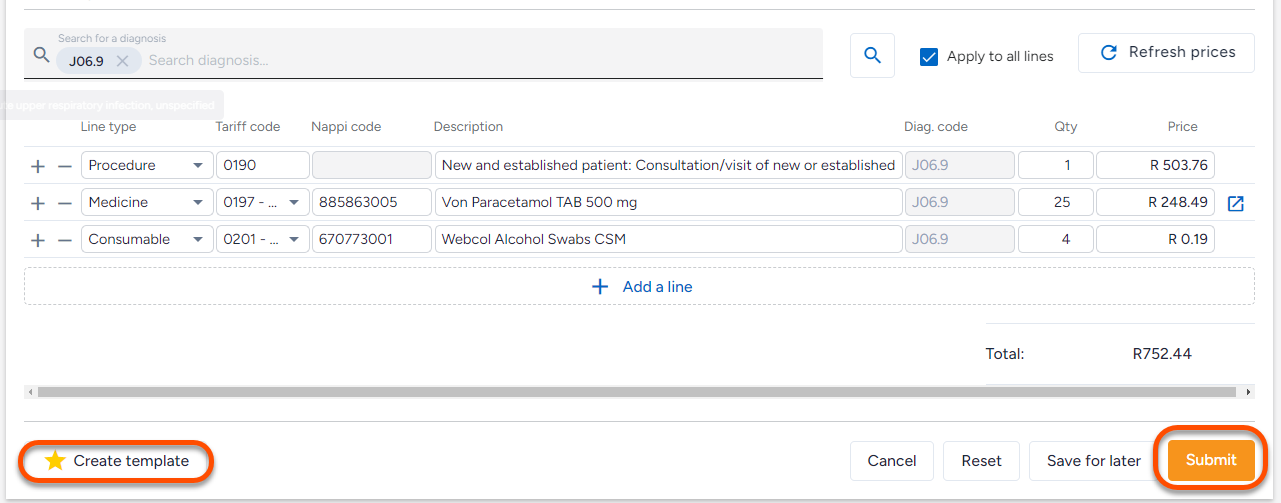
Once you have completed the diagnosis, you need to complete the invoicing information.
- Select the line type by clicking on it; this will open a drop-down menu.
- Insert the 'Tariff' code.
- Insert the 'Nappi' code if it is a medicine or consumable.

Once completed, you can click on 'Submit'.
If this claim is similar to many other claims, you can save the claim details and create a template by clicking on 'Create template'.


