How to Take on Stock
How to Access Stock Take-On
- From the top navigation bar, click Stock Management.
- In the left-hand menu, click Stock level listing.
- Click on the Stock take-on button located in the top right corner of the screen.
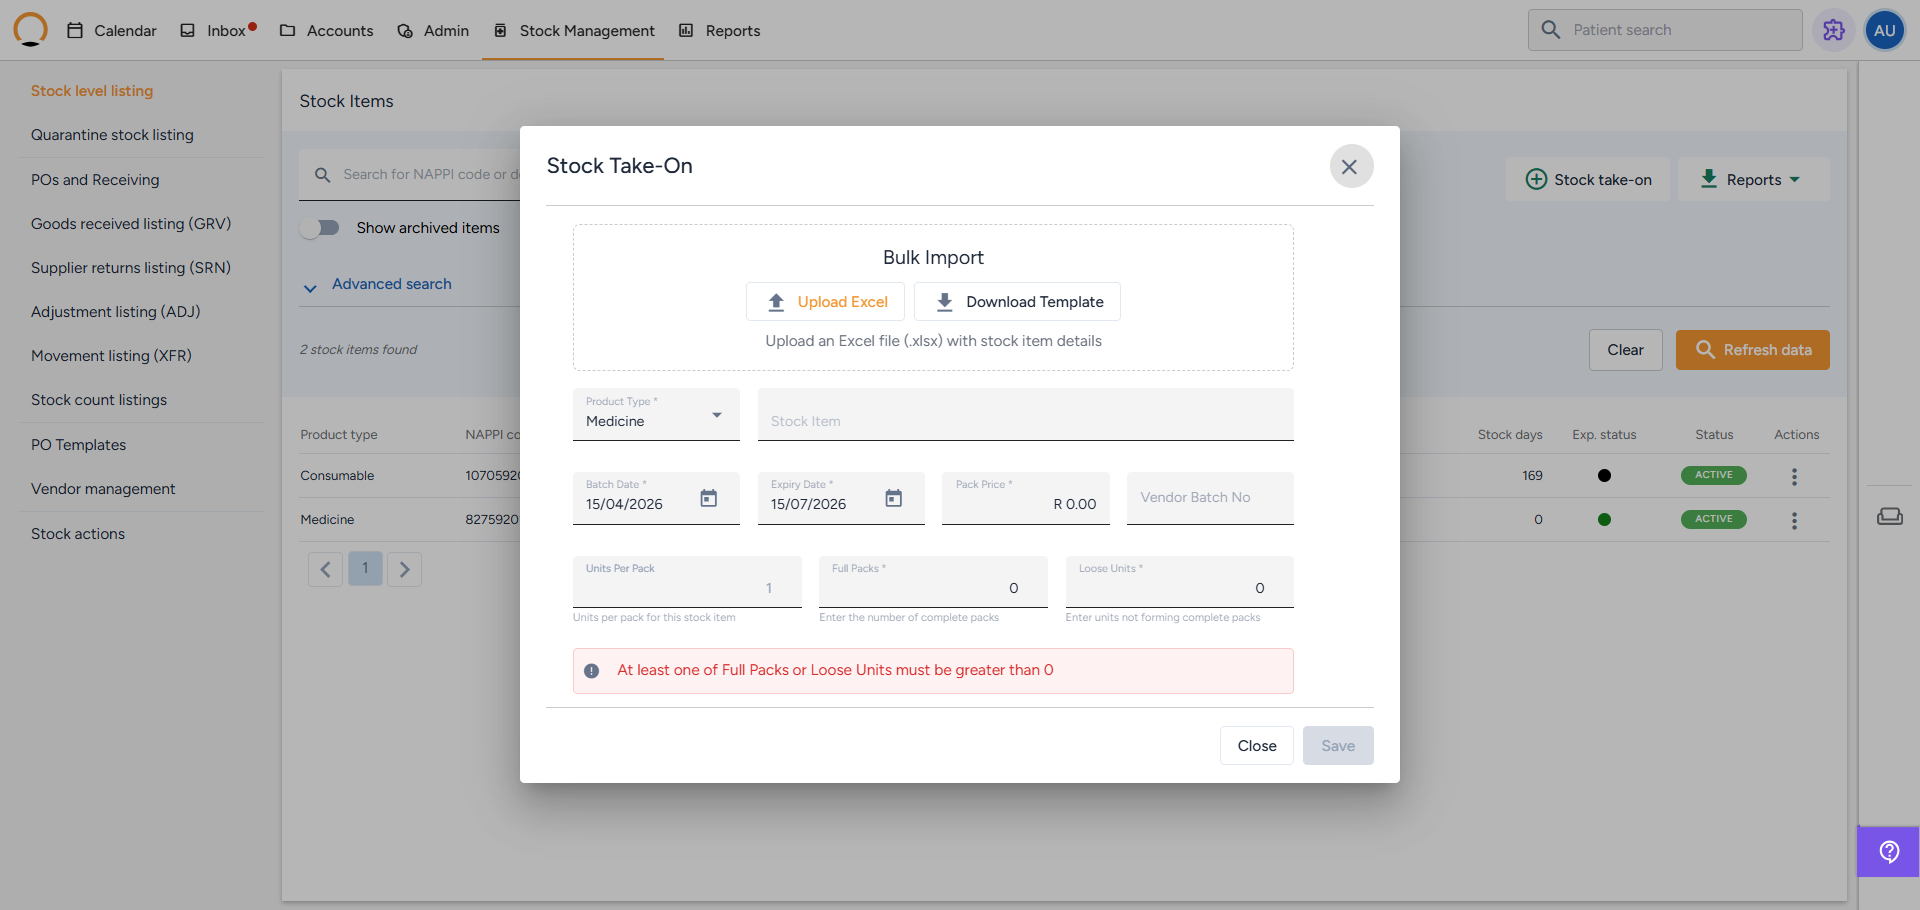
A window will pop up offering you two ways to add stock: Manual Entry (bottom section) or Bulk Import (top section).
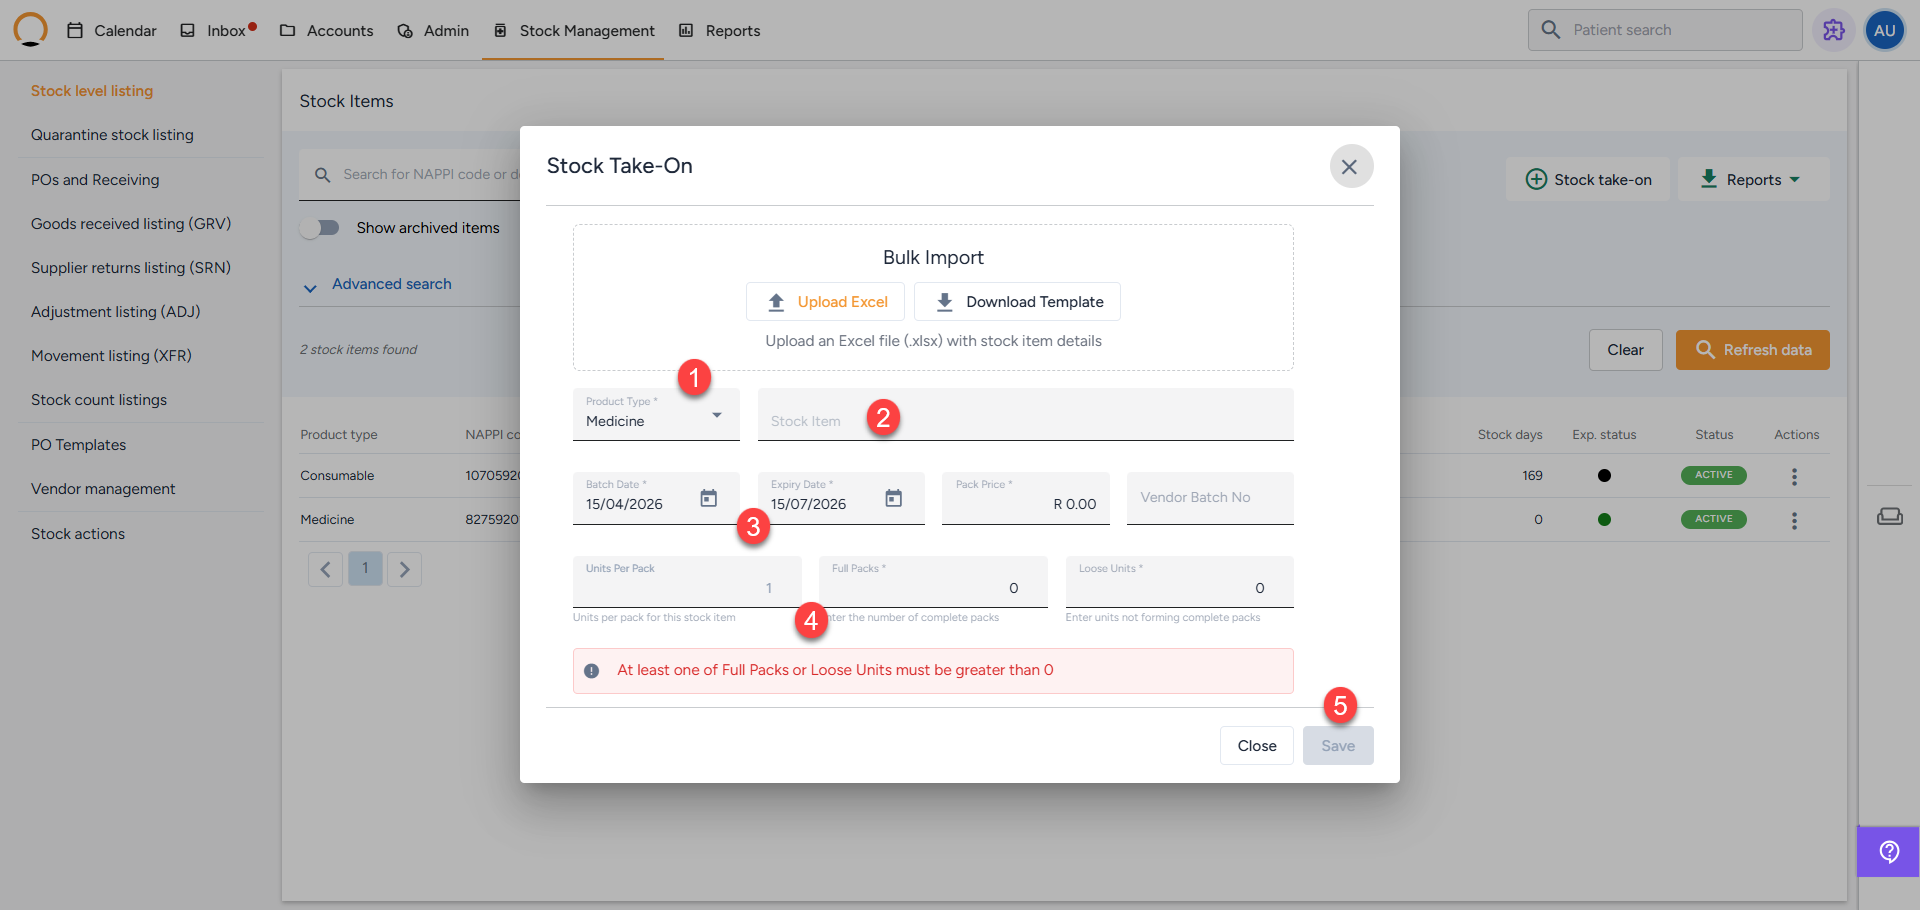
Option 1: Manual Entry (One item at a time)
Best for adding a few free samples or individual items.
Step 1: Select the Product Type Choose Medicine, Consumable, Custom Medicine, or Custom Consumable from the dropdown. ( Note: Custom items must first be created in your Admin settings under 'Custom charge codes' before they will appear here).
Step 2: Search for the Item Start typing the NAPPI code or the product name in the 'Stock Item' field. The system will search the database and you can select the correct item from the list.
Step 3: Fill in the Details
- Batch Date: The date the stock arrived. (If left blank, it defaults to today).
- Expiry Date: The date printed on the packaging. (If left blank, it defaults to exactly one year from today).
- Pack Price: The purchase cost of a single pack.
- Vendor Batch No: (Optional) The supplier's batch number for traceability.
Step 4: Enter the Quantities (Crucial Step)
- Full Packs: Enter the number of completely sealed, unopened boxes.
- Loose Units: Enter any individual units from a partially opened box (e.g., 12 loose tablets left in an open box).
- Note: At least one of these fields must be greater than zero. The system will auto-calculate your total units.
Step 5: Save Click Save at the bottom right. The item is immediately added to your Dispensing Bin.
Option 2: Bulk Import (Via Excel)
Best for loading your entire storeroom of stock during your initial setup.
Step 1: Download the Template In the top Bulk Import section of the pop-up, click Download Template. Save this Excel file to your computer. Do not rename or remove any of the columns.
Step 2: Fill in the Spreadsheet Complete one row for each item. If you have the same product but with two different expiry dates, put them on two separate rows.
- Product Type: Type exactly as shown (Medicine, Consumable, etc.).
- NAPPI Code: Must be 100% accurate or the row will fail.
- Pack Price: Enter the cost per single pack (numbers only, no currency symbols).
- Units (Crucial Difference): Unlike the manual entry, the Excel template requires the total combined units, not the number of packs. For example, if you have 5 packs of 20 tablets, plus 10 loose tablets, you must enter 110 in this column.
Step 3: Upload the File Return to the Stock Take-On pop-up, click Upload Excel, and select your completed file.
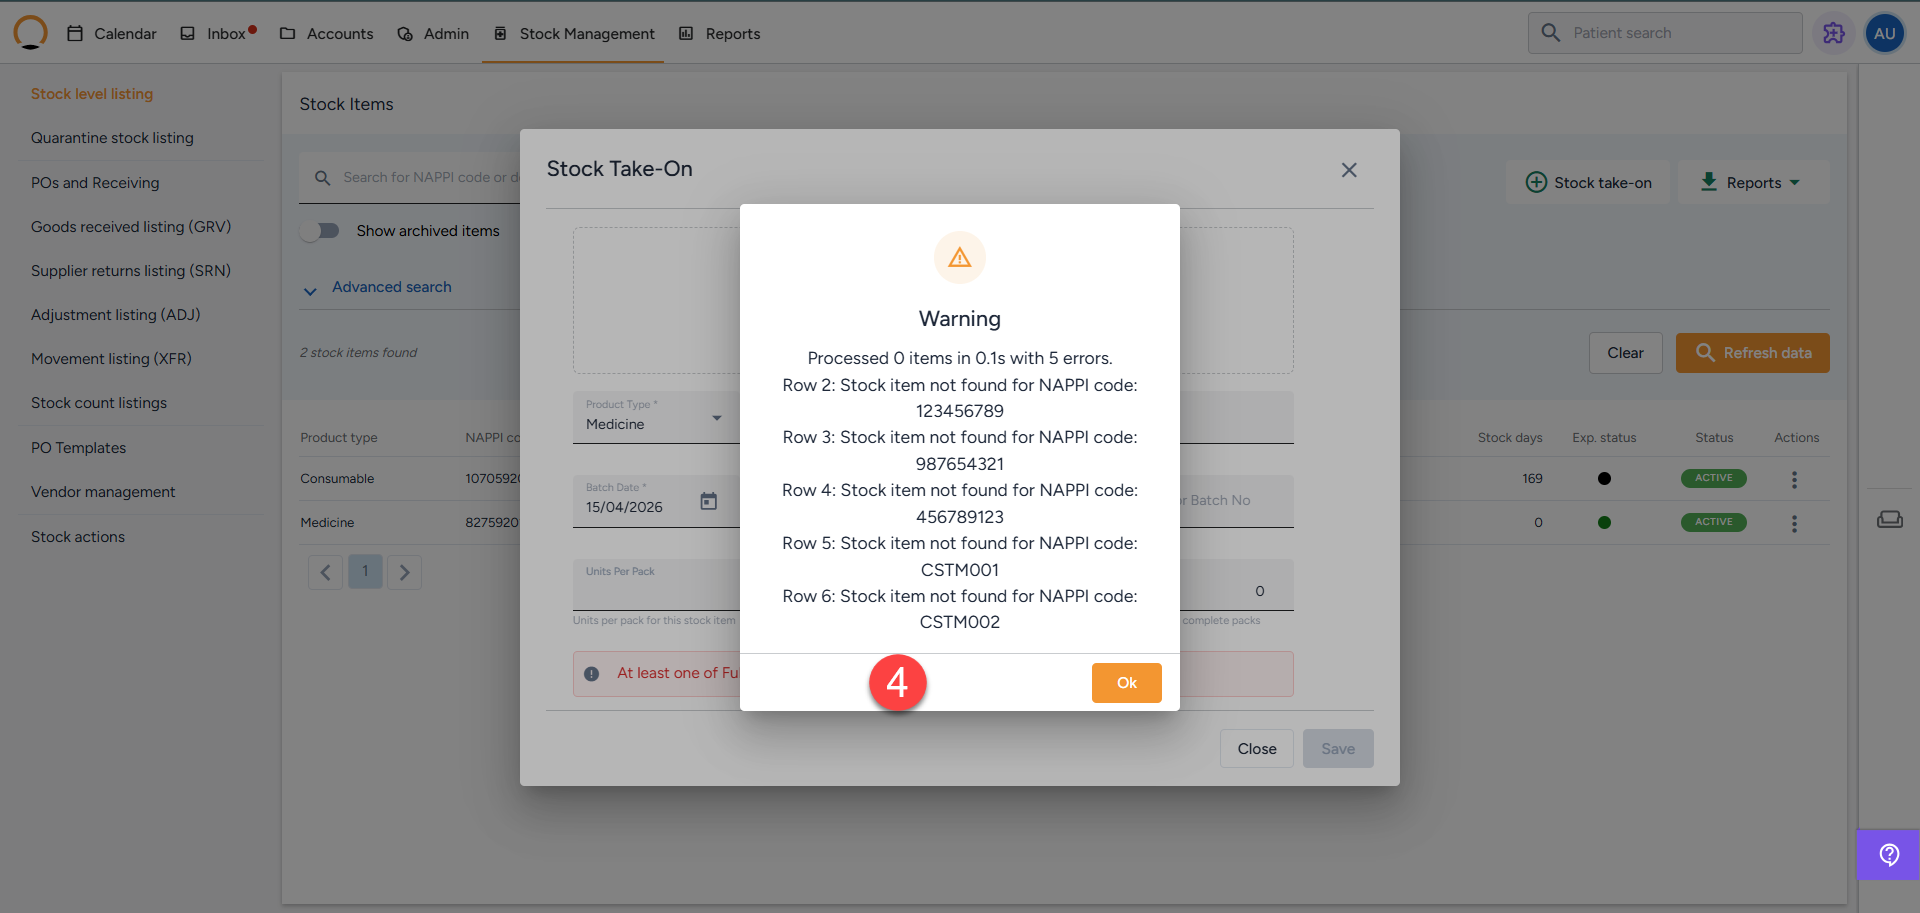
Step 4: Handle Errors The system will validate your rows. If any rows have errors (like an invalid NAPPI code), it will instantly generate and download an error report detailing exactly which row failed and why.
- Open the error report to see the issues.
- Fix those specific rows in your template.
- Re-upload only the corrected file. Rows without errors are imported immediately, so re-uploading the whole file would duplicate the successful items.