
Stock Adjustments
A Stock Adjustment is used when you need to permanently change the quantity of an item in your system to match what is physically on the shelf. This is necessary to correct discrepancies caused by clerical errors, theft, miscounts, or when writing off damaged and expired goods.
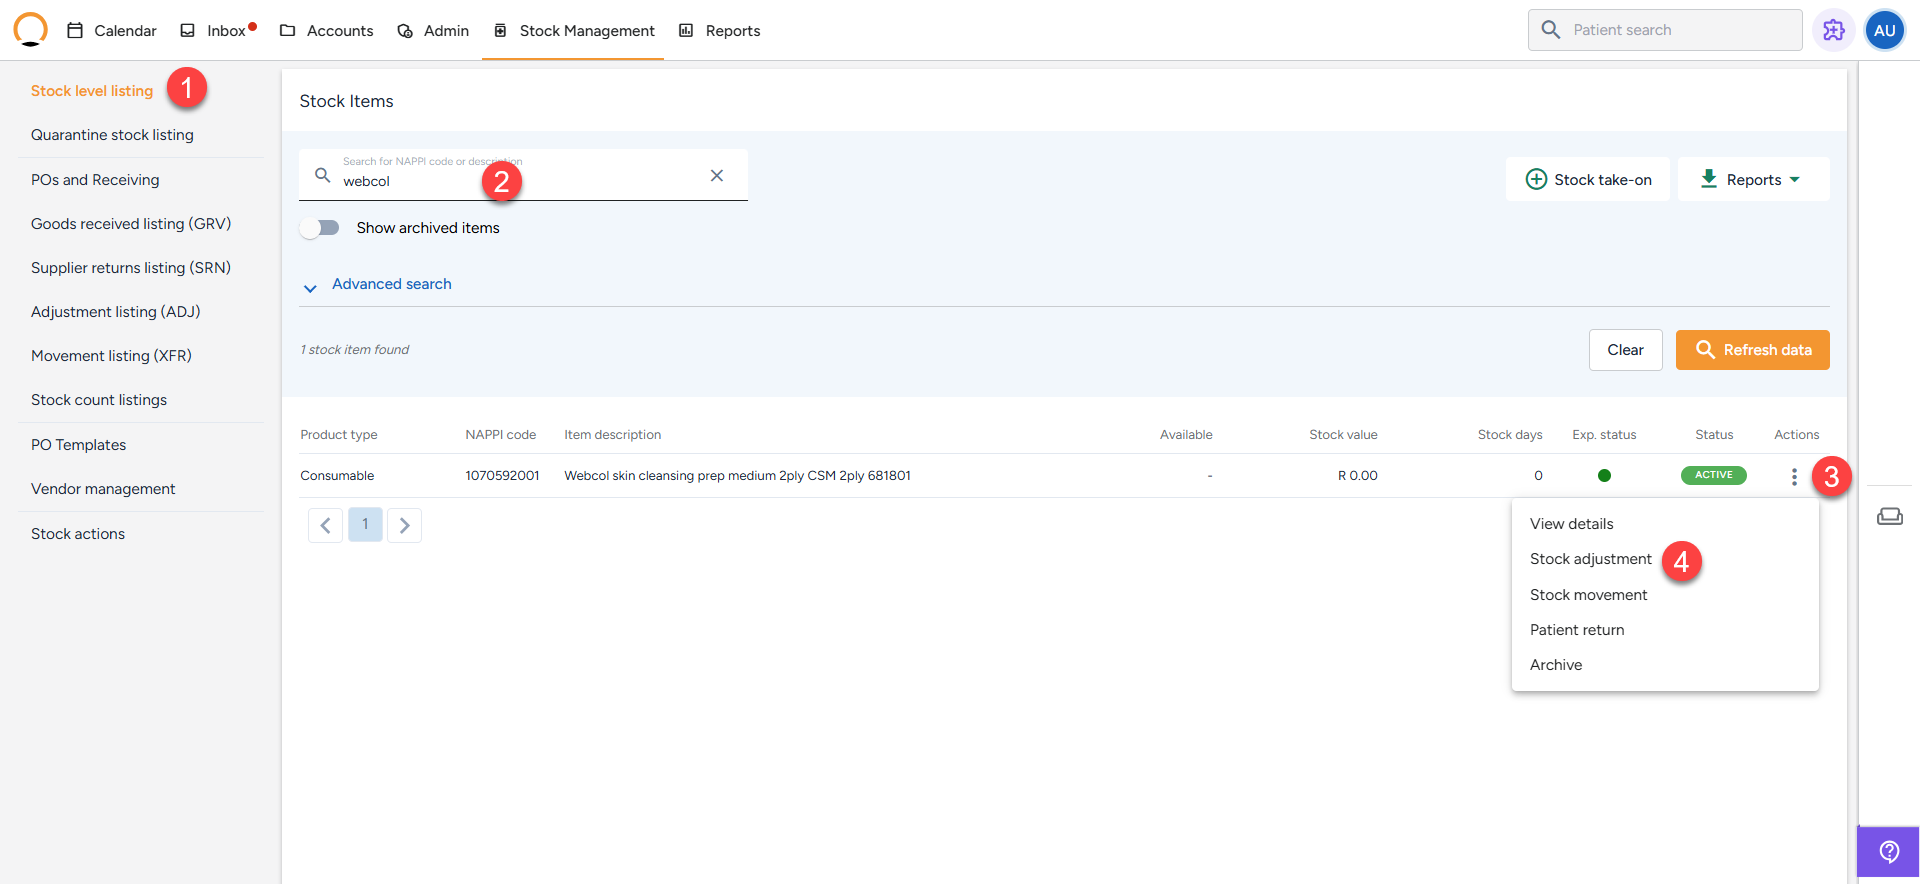
- Navigate to the Stock Tab and select "Stock Level Listing" from your main menu.
- Use the search bar to find the item that needs to be adjusted either by entering its Nappy code, description, or batch ID.
- Click the three-dot menu (⋮) next to the specific stock item.
- Select Stock Adjustment from the dropdown options.
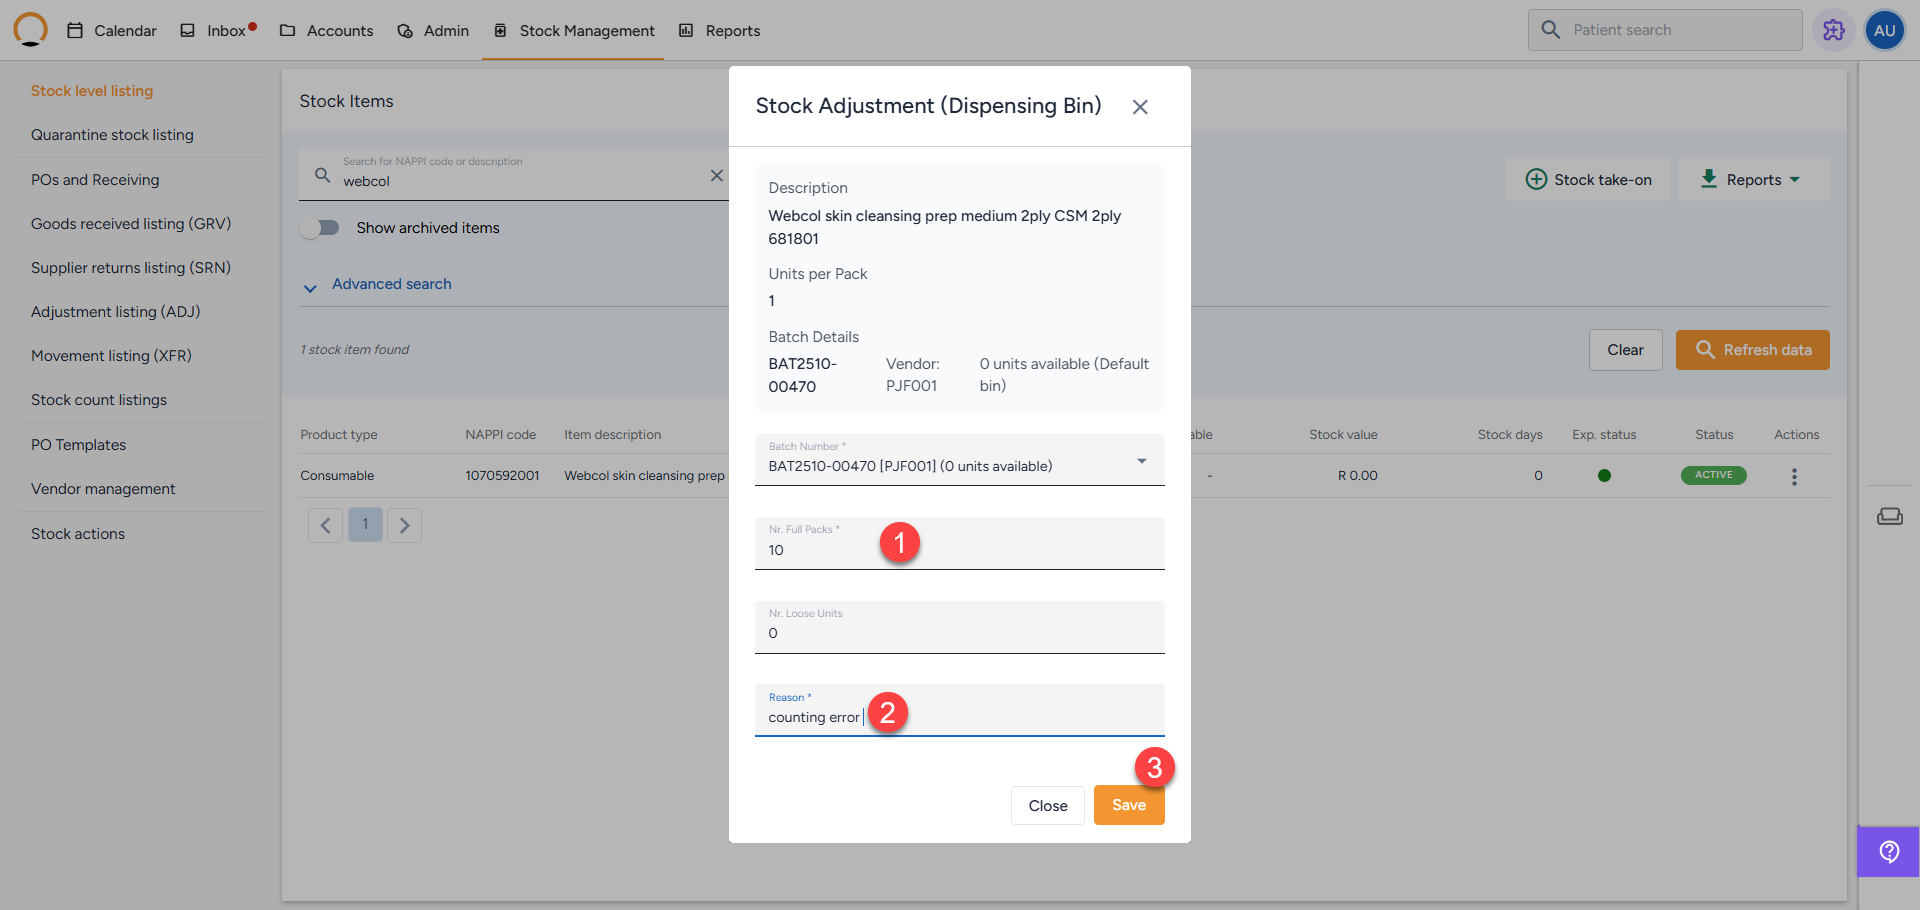
- Enter the amount that is required to be adjusted. You can perform a positive adjustment to add stock or a negative adjustment to remove stock.
- The user is required to supply a clear reason for the adjustment (e.g., "Post-count correction," "Expired," or "Clerical error - given to patient in error")
- Click "Save" to finalize. The system will immediately create an ADJ record with a unique document ID (e.g., ADJ2504)
How to View Completed Stock Adjustments
Whenever a stock adjustment is saved, it is permanently logged in the system to maintain a secure audit trail. You can view all of these historical records in the Adjustment Listing (ADJ).
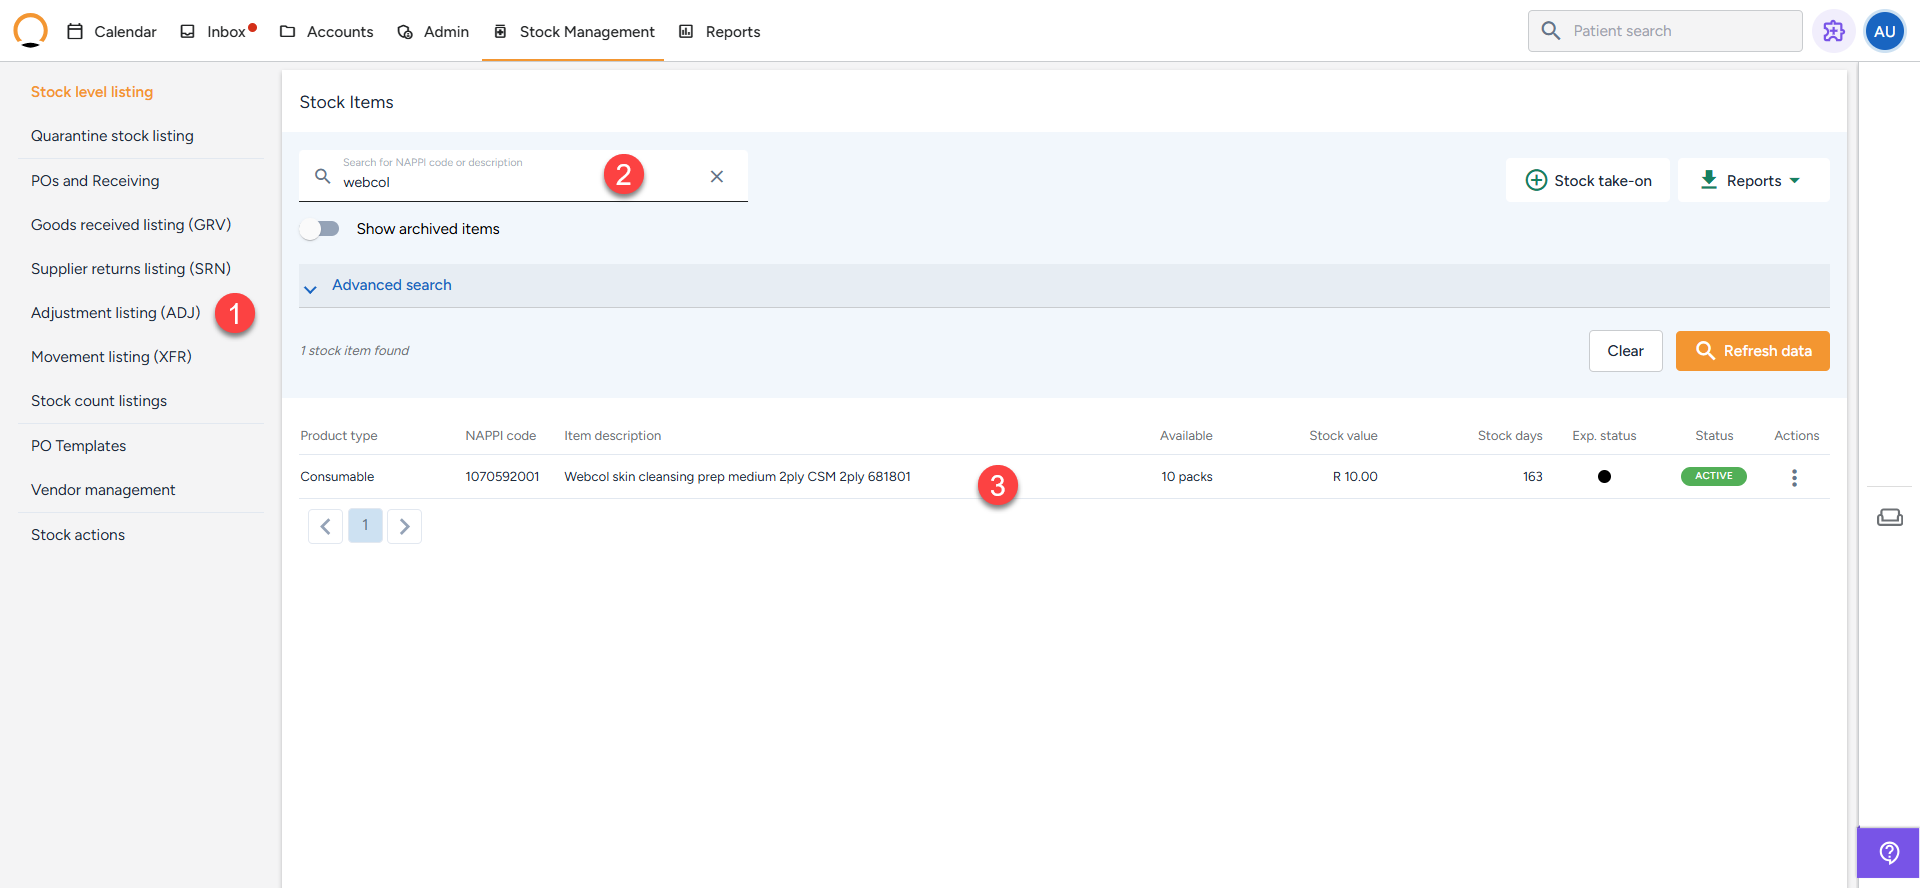
- Select the "Adjustment Listing" option On the left-hand menu panel
- From the Adjustment Listing(ADJ) screen the user can view all saved adjustments. Find specific items by using the search bar, date filters, or selecting Advanced Search for more options.
- Review the Adjustment Details For every saved adjustment on this list, you will be able to see a comprehensive breakdown of the action.
💡 Pro Tip: Because there is no "undo" button for adjustments, any mistakes that needed to be reversed will also appear here as new, separate adjustment entries. Always encourage your team to use clear, consistent reasons so this log remains easy to audit.